What is it
You can invite, deactivate, activate and delete users from the ‘manage users’ section.
Who is it for
Managing users is typically for a platform administrator, tool owner or person with the responsibility of managing access for the people using the platform within the company.
Why is managing users important?
You typically want to ensure that everyone within your company has the right access when they need it but also to remove users when they do not need access anymore. A lot of documents contain sensitive data that are not meant for everybody. For safety and security reasons, it is important to timely delete or deactivate users that don’t need access.
In addition, which and how many users are on the platform could help to understand if the current plan needs to be upgraded or downgraded.
Overview users
For an overview of all users, follow the next steps.
- Go to ‘Settings‘ in the outer sidebar on the left.
- Click on ‘Manage Users‘. Users will be shown in a list. It is possible to rearrange the list. This can be done by clicking on ‘Name’, ‘Email’ or ‘Status’.
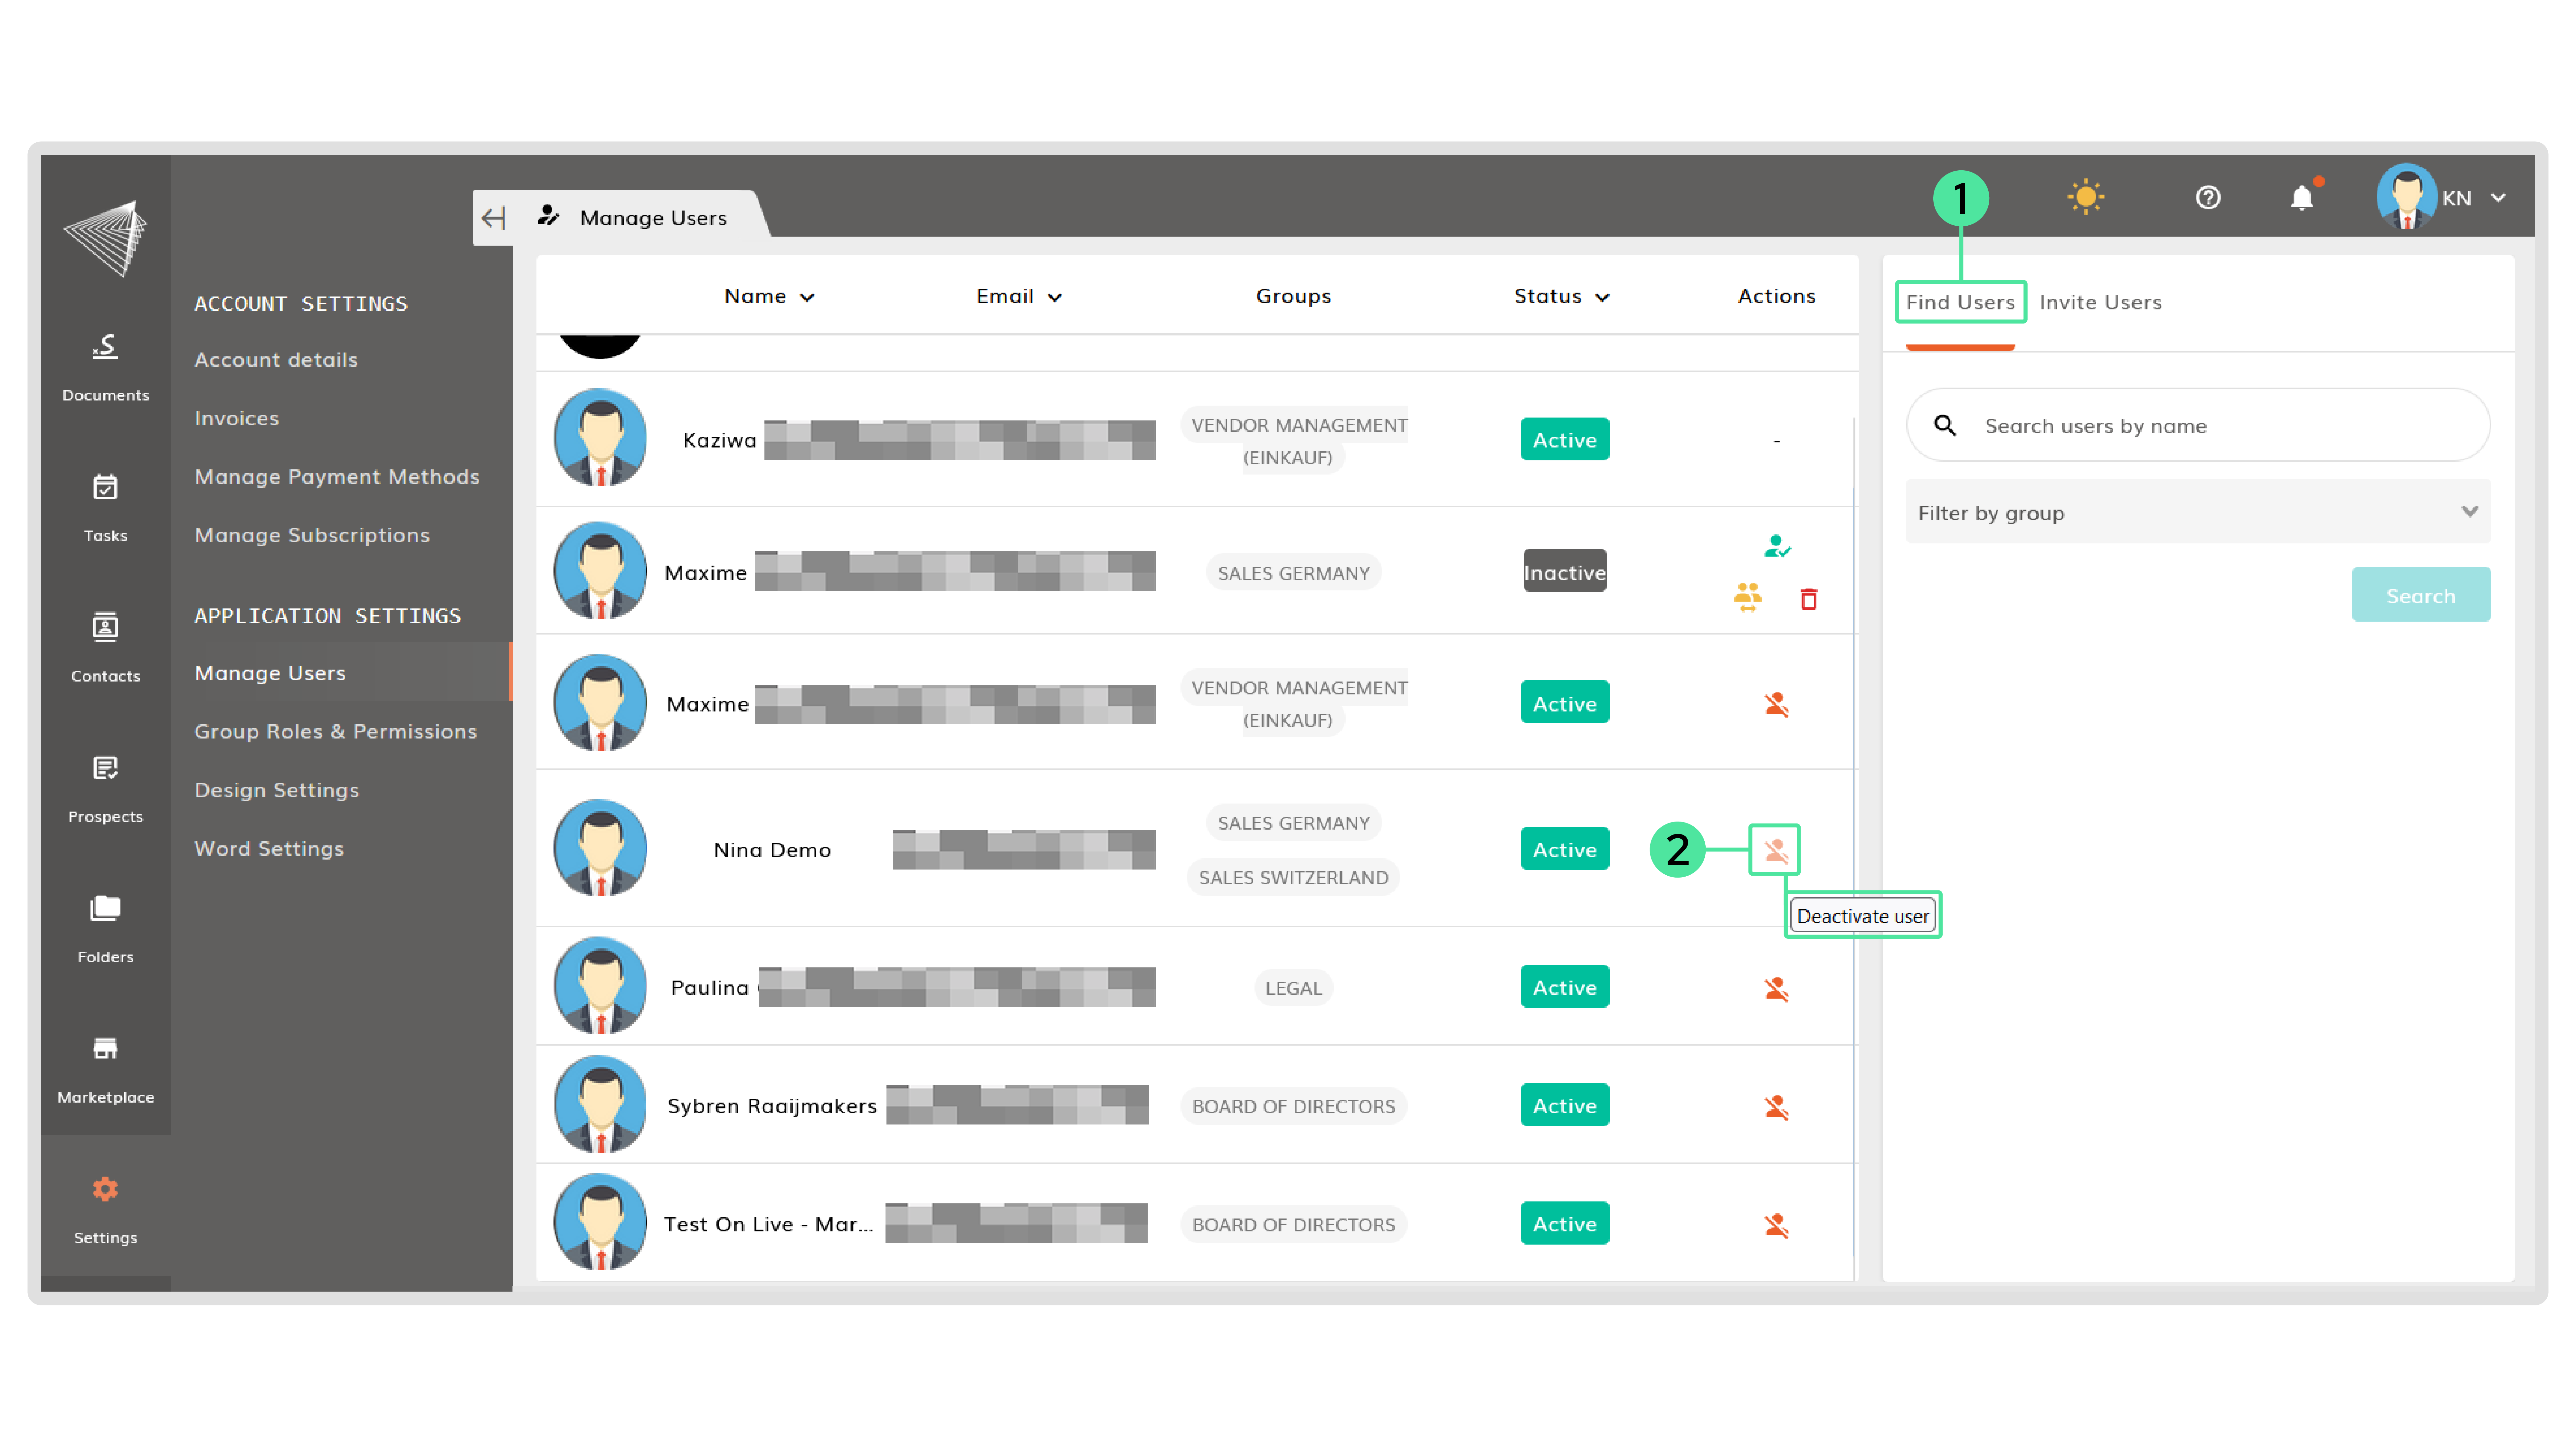
How to deactivate a user
Deactivated users cannot log in to their account anymore, but documents and assets are still assigned to this user. A reason why you may want to deactivate a user instead of deleting them could be if someone goes on leave for a longer period of time.
If you want to deactivate a user, follow these steps:
- Click on ‘Find Users‘ and type the name of the user that needs to be deactivated.
- The user will appear on the left. Click on the red individual icon with a stroke to deactivate the user. The user is now deactivated and can’t log in until the account gets activated again.
How to delete a user
If you want to permanently delete a user, follow the next steps.
- Deactivate the user that needs to be deleted as described in the steps above at ‘Delete User‘.
- Click on the yellow icon in the ‘Action’ column next to the username, that stands for ‘Reassign User Assets‘.
- Click on the drop down menu to view the list of all other users. Scroll through the list or type the name of the user that the assets need to be assigned to.
- Click on the user that the assets need be assigned to and click on ‘Confirm‘.
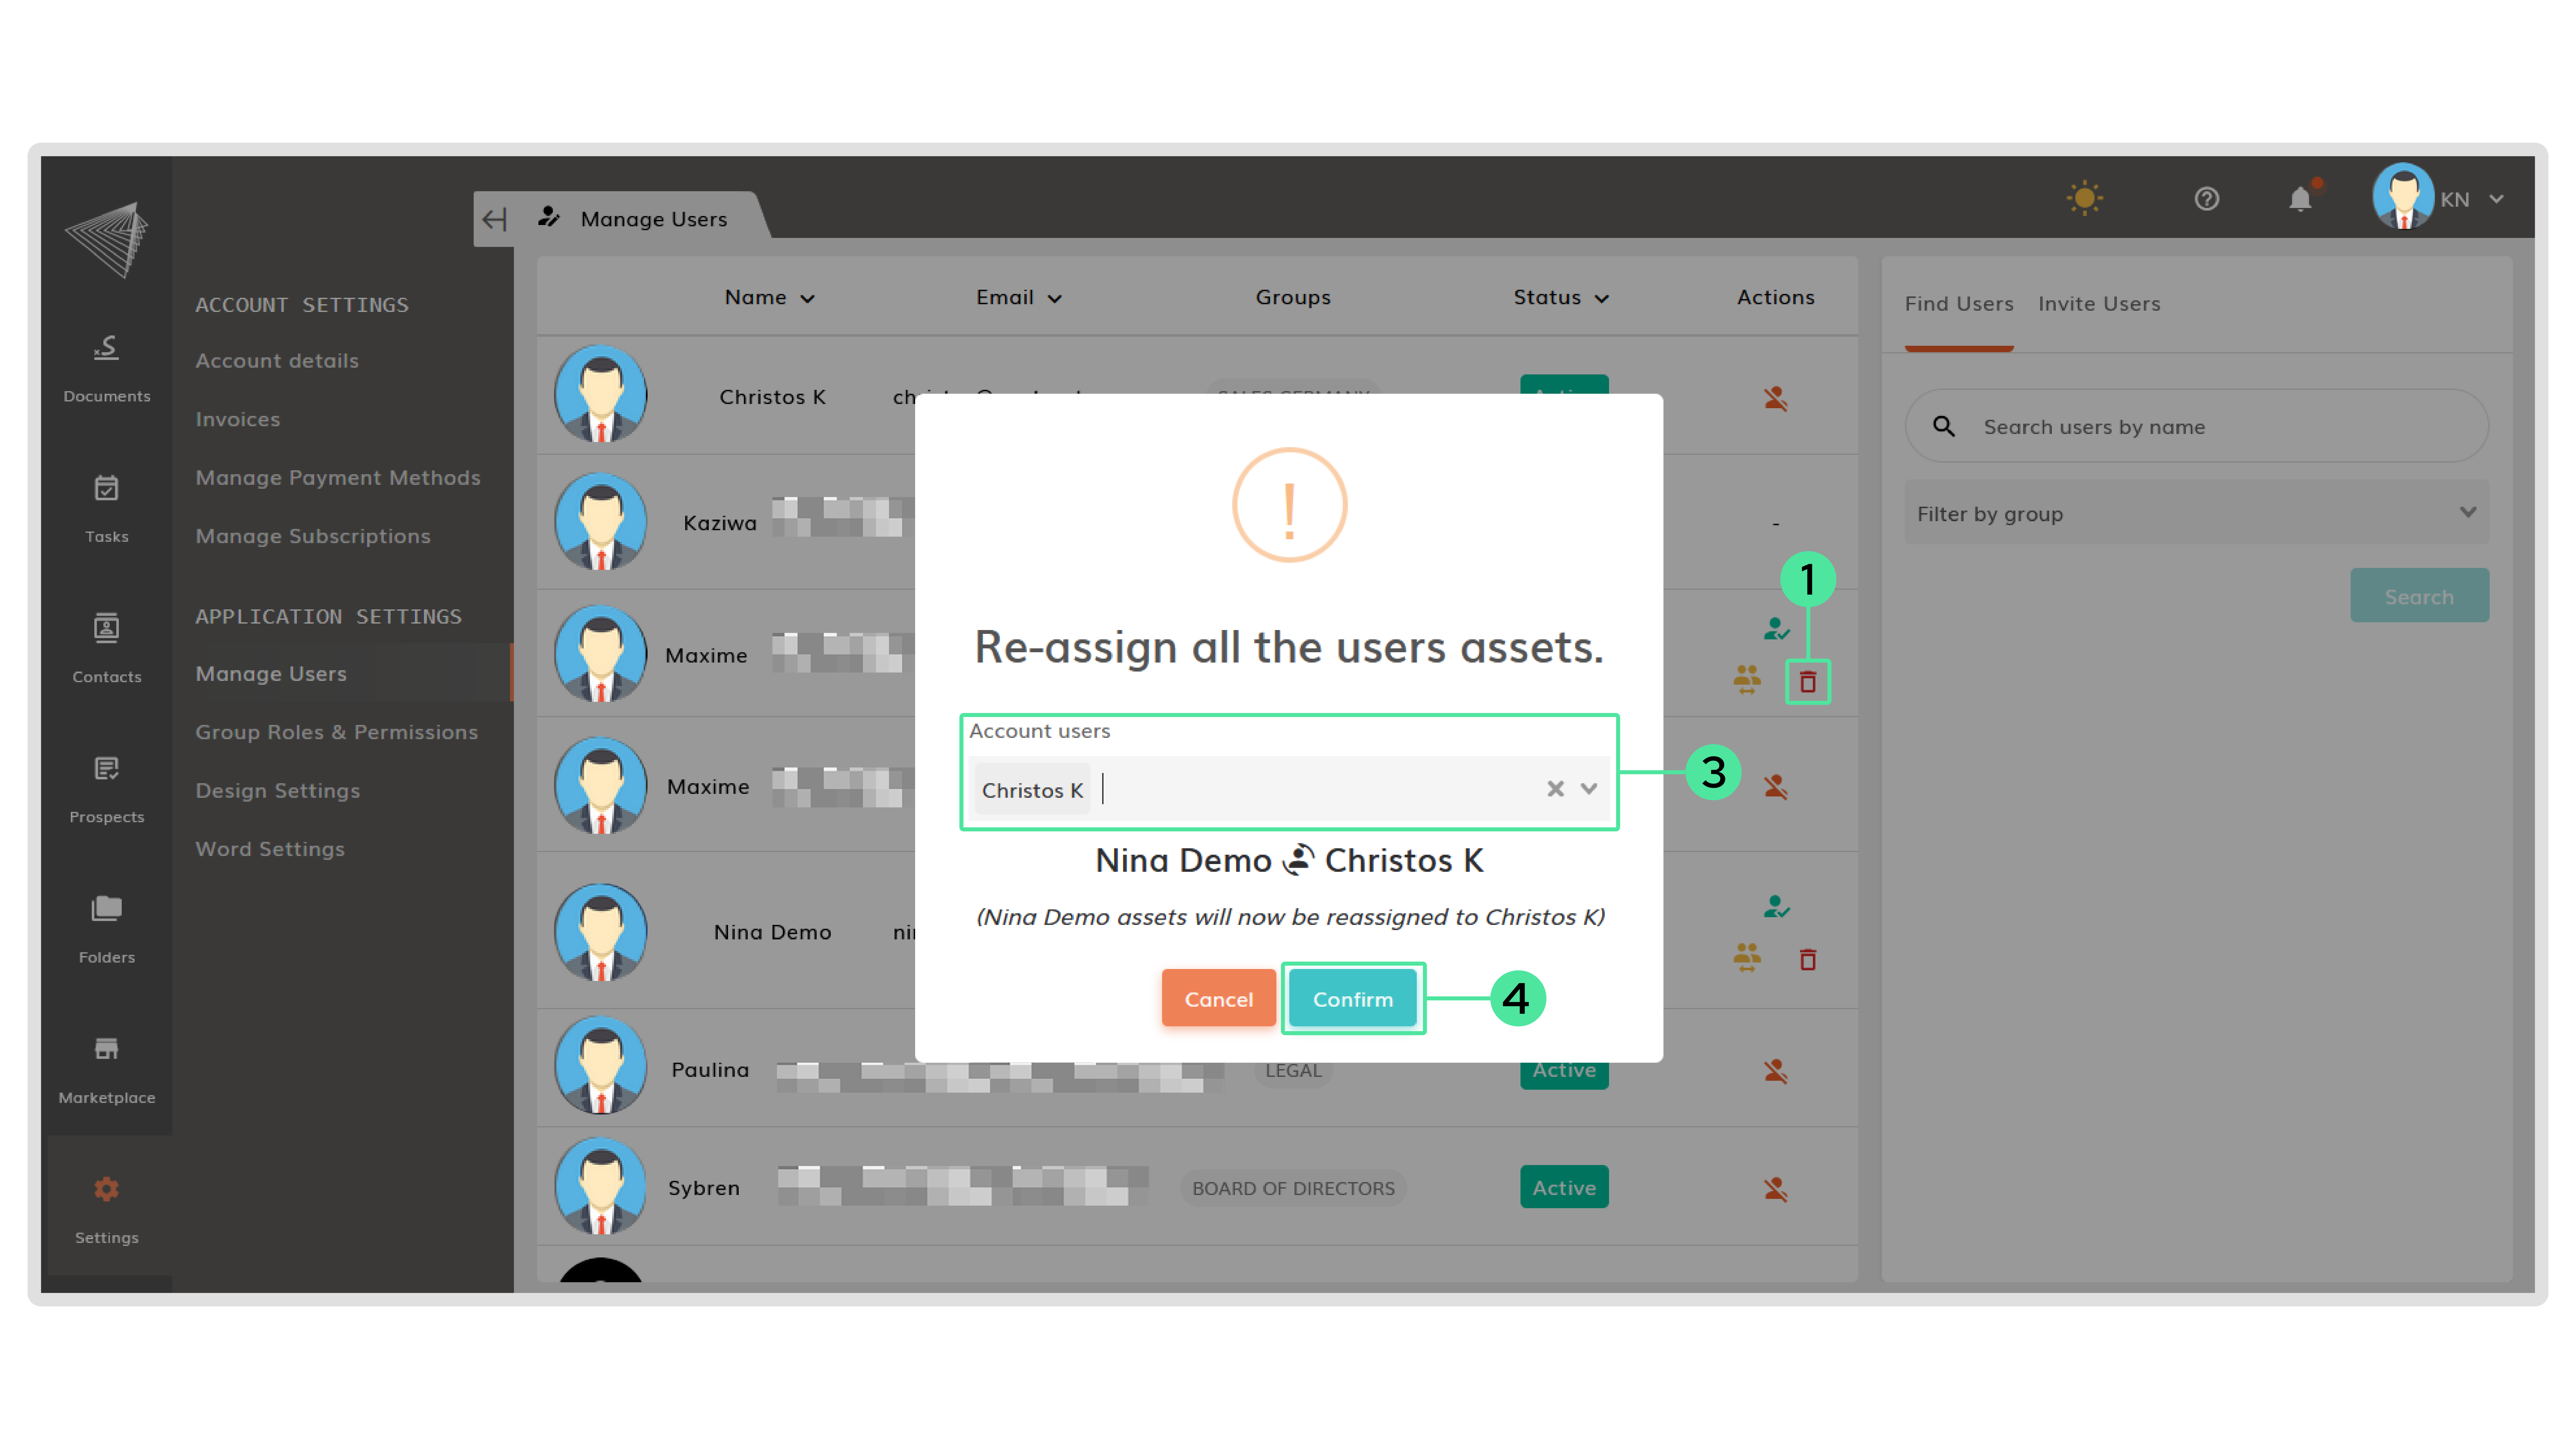
- The assets are moved now. If you are sure that you want to delete the users account, click on ‘Delete user‘.
- The user has been deleted.
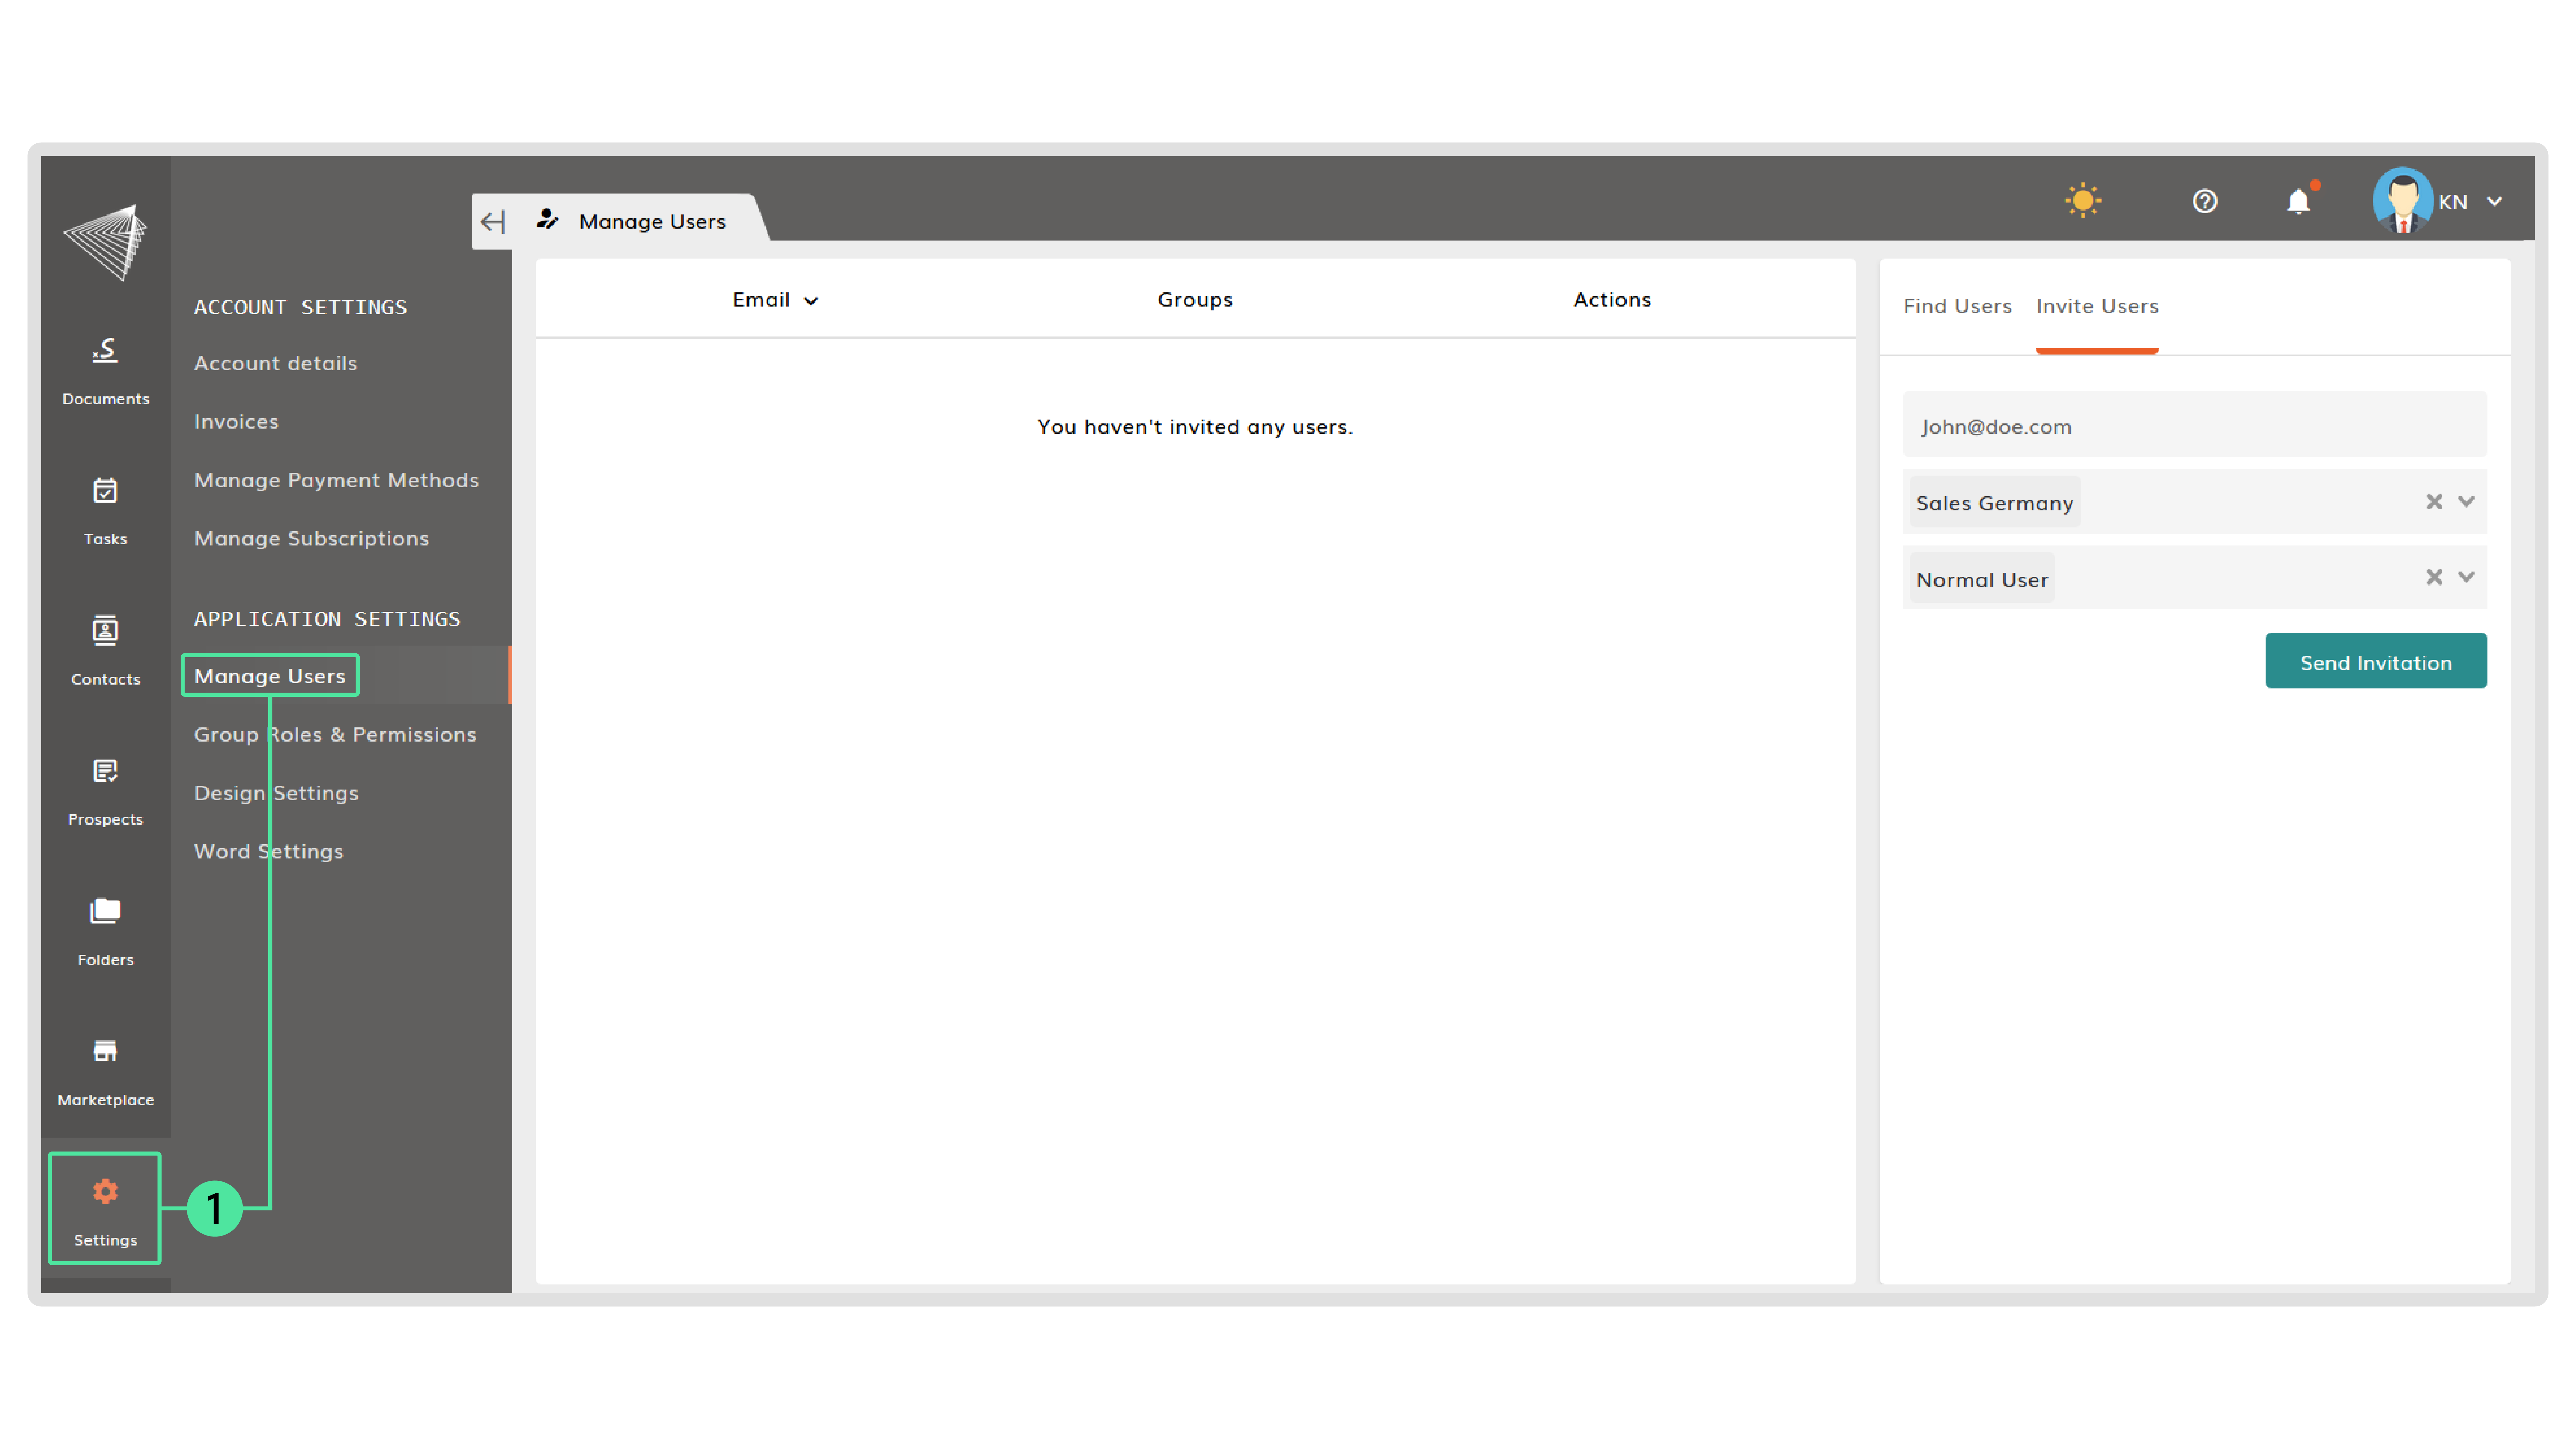
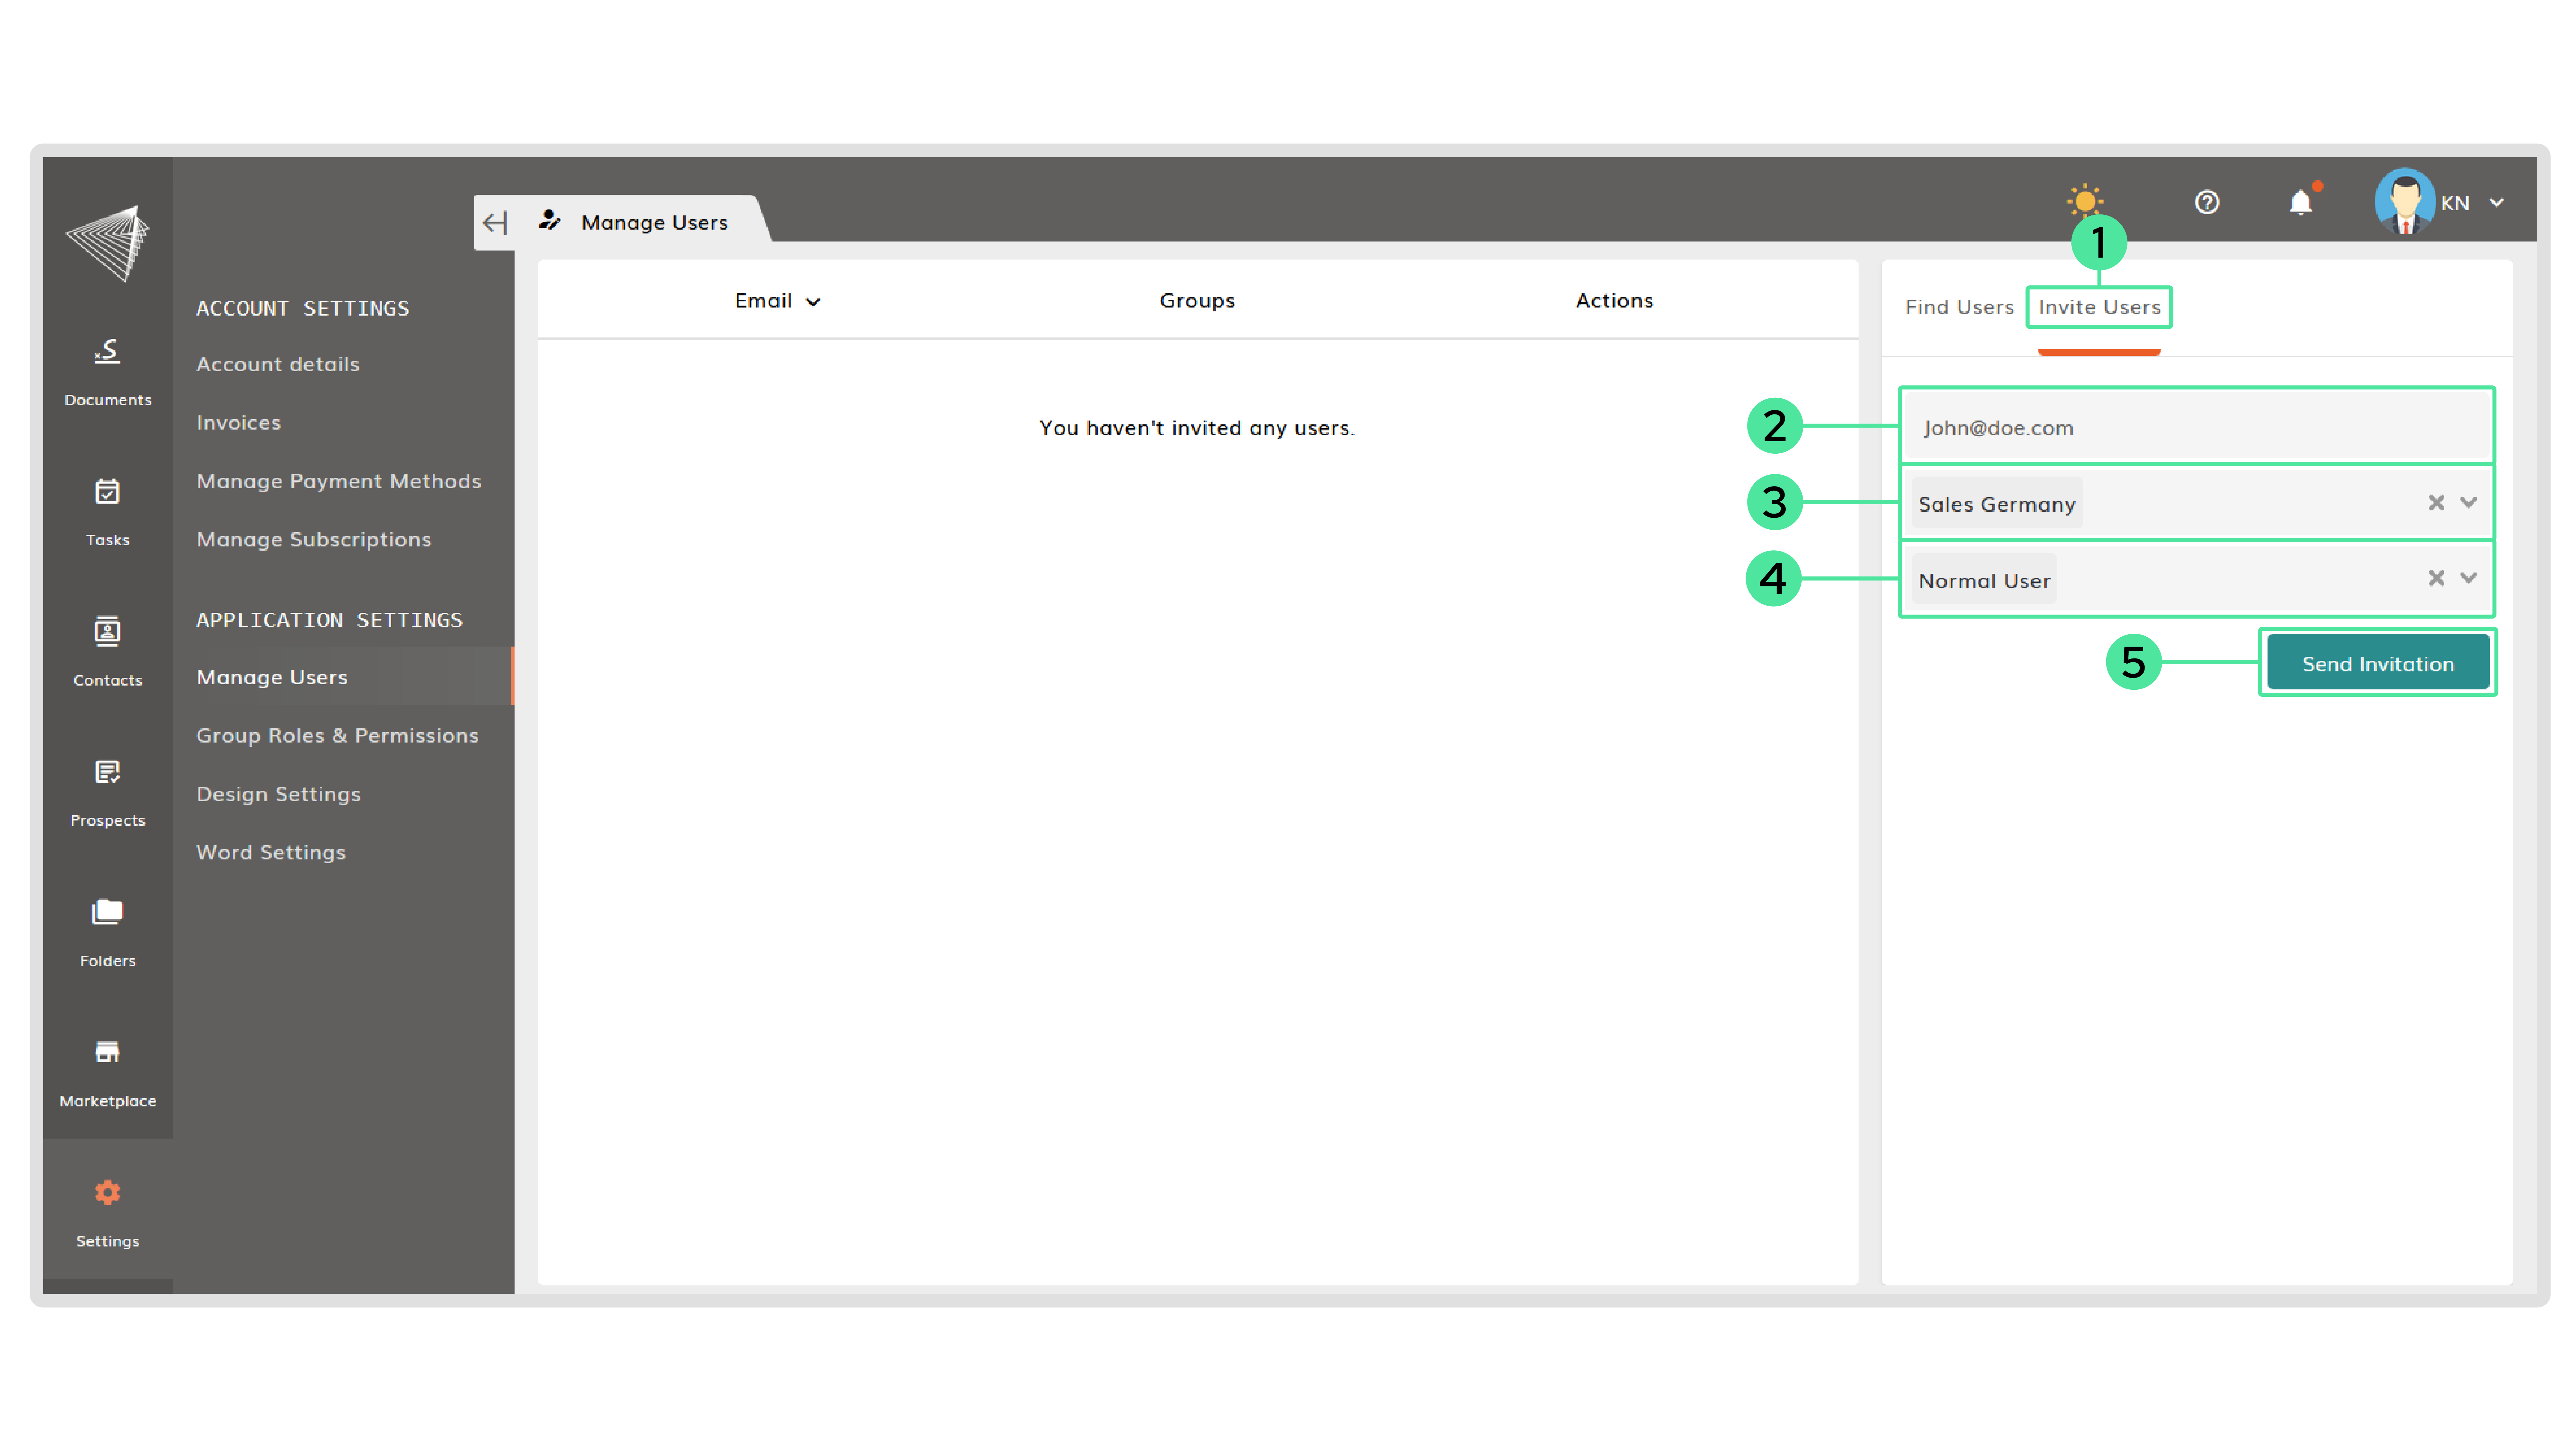
How to invite a user
- If you would like to add a user to this account, click on ‘Invite User‘ on the top right.
- Fill in their email address.
- Select a group where the user would belong to.
- Select a user role.
- Click on ‘Send invitation‘. When the user created an account by using the invitation, the inviter will receive an email or notification, depending on the settings.
- The new user will be visible on the list of all users under ‘Manage Users‘.