What it is
The Manage Users section is your central hub for managing all users within your contractuo organization. From inviting new members and assigning roles to redistributing assets and ensuring security, this powerful tool empowers you to keep your team organized and productive.
Who is it for
This section is exclusive to contractuo Administrators. As an Administrator, you have the authority to oversee user management, ensuring smooth operations and optimal team collaboration.
Why use it?
- Centralized user management: Get a complete overview of all users in your organization, their roles, and group memberships.
- Effortless onboarding: Invite new members with ease and assign them appropriate roles, and groups directly.
- Flexible role management: Grant, during the invitation “Normal user” or “Administrator” privileges to different users based on their responsibilities.
- Streamlined asset reassignment: Easily transfer assets to other users when necessary, ensuring continuity and avoiding data loss.
- Enhanced security: Deactivate user accounts when needed to maintain data security and compliance.
Requirements:
You’ll have to have Administrator permissions in your organization.
How to find it?
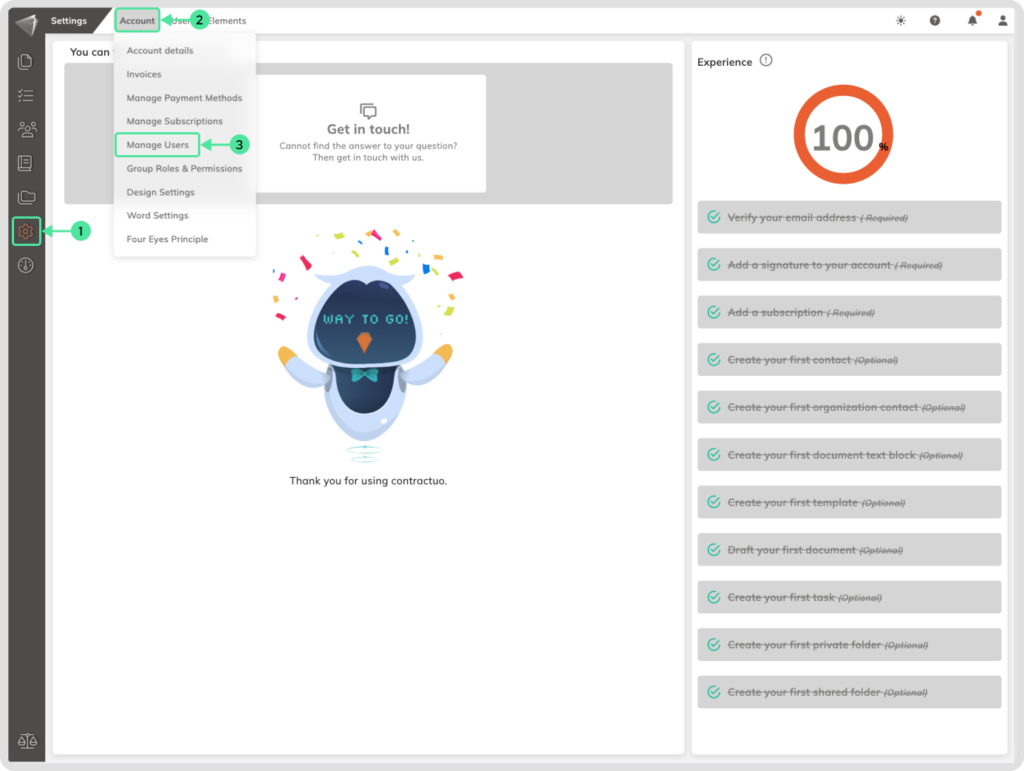
- Head to the Settings menu: Click on the gear icon on the left side of your screen.
- Navigate to Account: Select the ‘Account’ option from the Settings menu.
- Access Manage Users: Choose the ‘Manage Users’ submenu to open the user management interface.
What you’ll find:
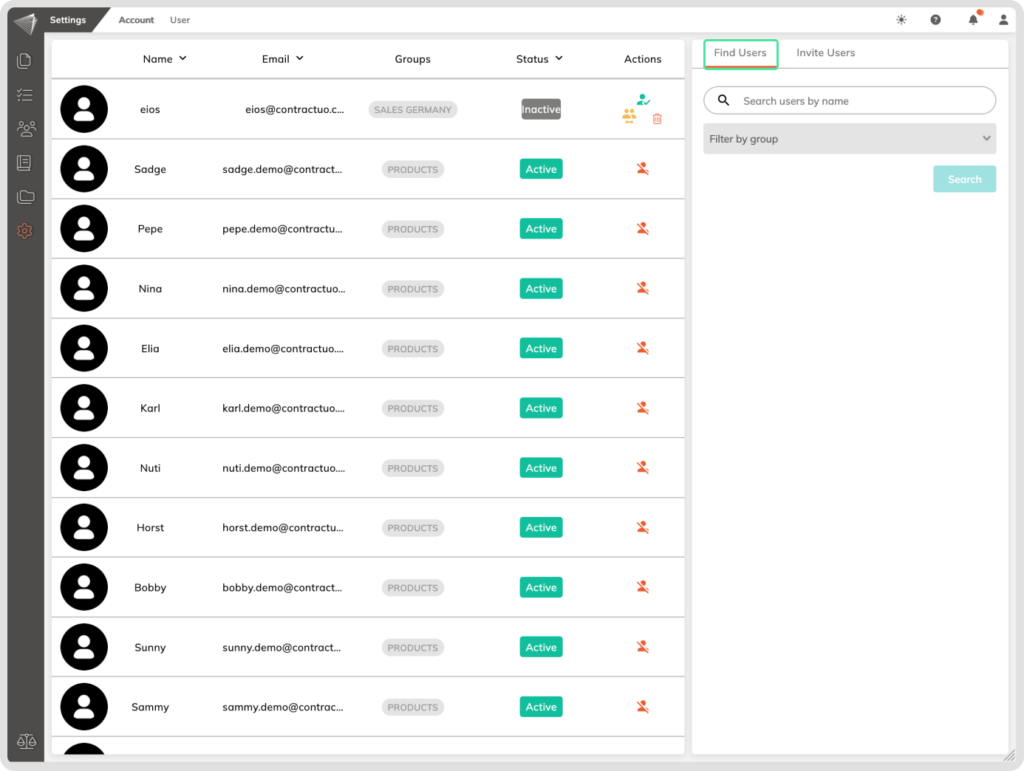
- User overview: See a list of all users in your organization, including their names, registration emails, group memberships, and current status.
- Search and invite: Use the “Find User” function to locate specific users or utilize the “Invite Users” submenu to welcome new members onboard and assign them roles directly.
- Role management: Easily change user roles between “Normal” and “Administrator” when registering them.
- Asset reassignment: Seamlessly transfer assets to other users when needed, ensuring smooth workflows and data continuity.
- User deactivation: Temporarily suspend user accounts if necessary to maintain security and compliance, or permanently delete them from your organization.
How to invite users into your organization:
Go to the Settings menu, inside the Account you will find the submenu named ‘Manage Users’ select the Manage Users submenu.
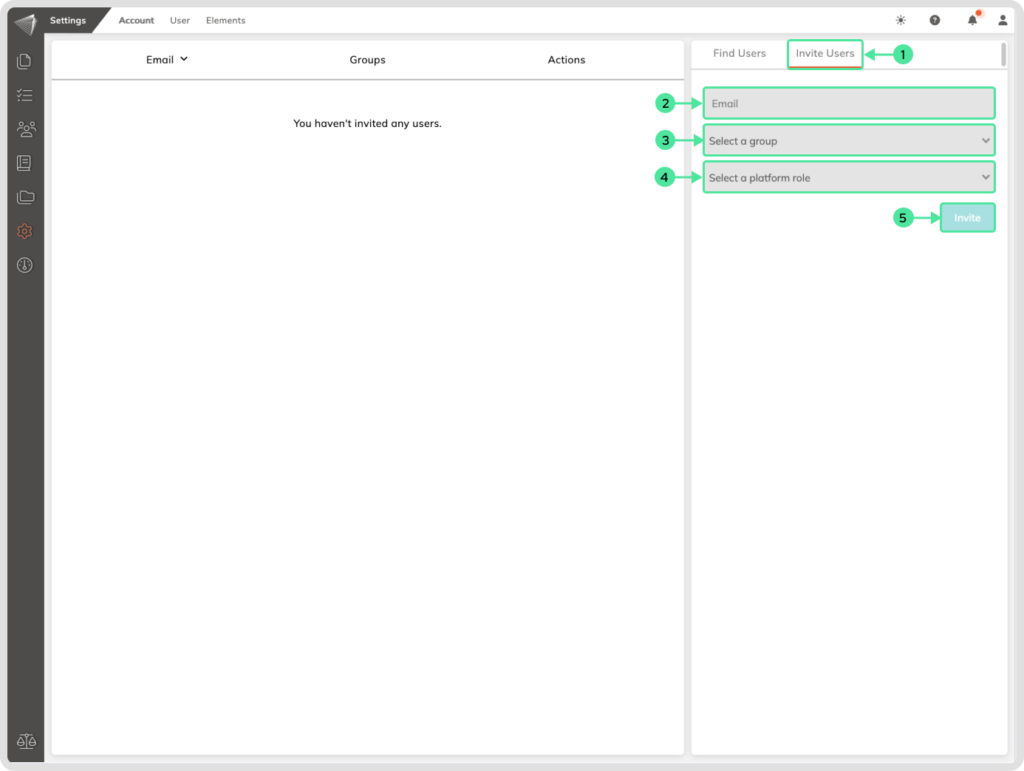
- Open the ‘Invite Users’ menu: Click the sidebar menu named “Invite Users” to get started.
- Fill in the email address: Enter the email address of the person you’d like to invite to your organization.
- Choose the right group: Select the most appropriate group for the new member. If you haven’t created any custom groups, the default group will be listed.
- Assign a role: Decide whether the new user will have “Normal User” or “Administrator” privileges based on their responsibilities.
- Save your steps and send the invitation out by clicking on the ‘Invite’ button.
Now that you’ve seen how easy it is to invite new members, let’s talk about situations where you may need to remove a user from your organization. We understand this can be necessary for various reasons, and contractuo helps you manage this process smoothly.
How to delete a users
Go to the Settings menu, inside the Account you will find the submenu named ‘Manage Users’ select the Manage Users submenu.
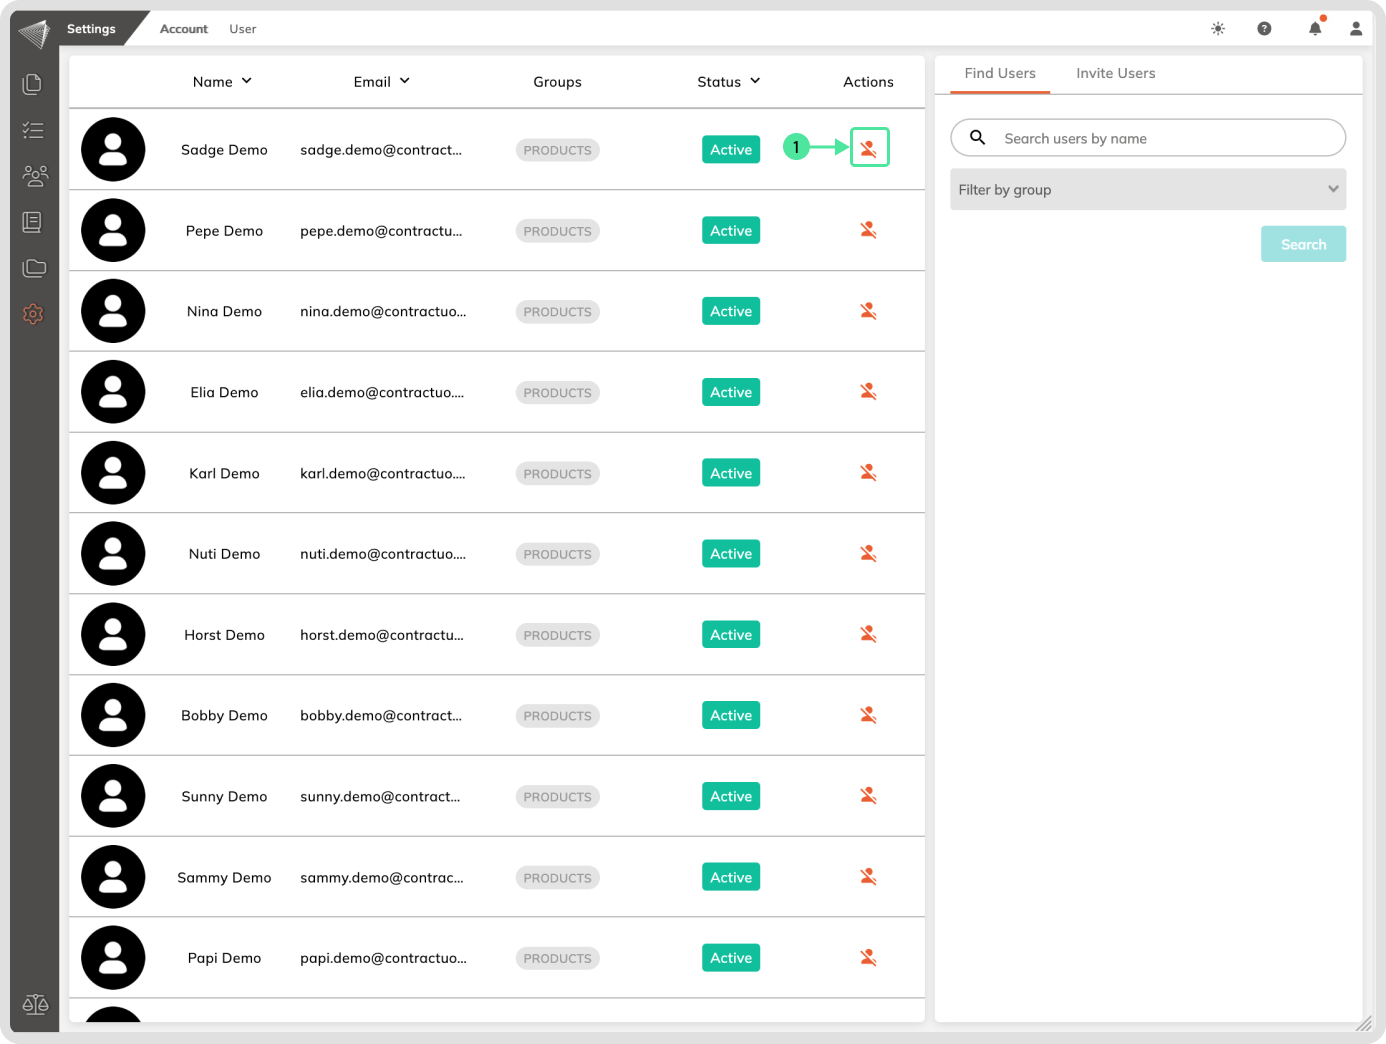
- Locate the user and click on the deactivation icon next to the user’s name. This disables their login but keeps their data secure.
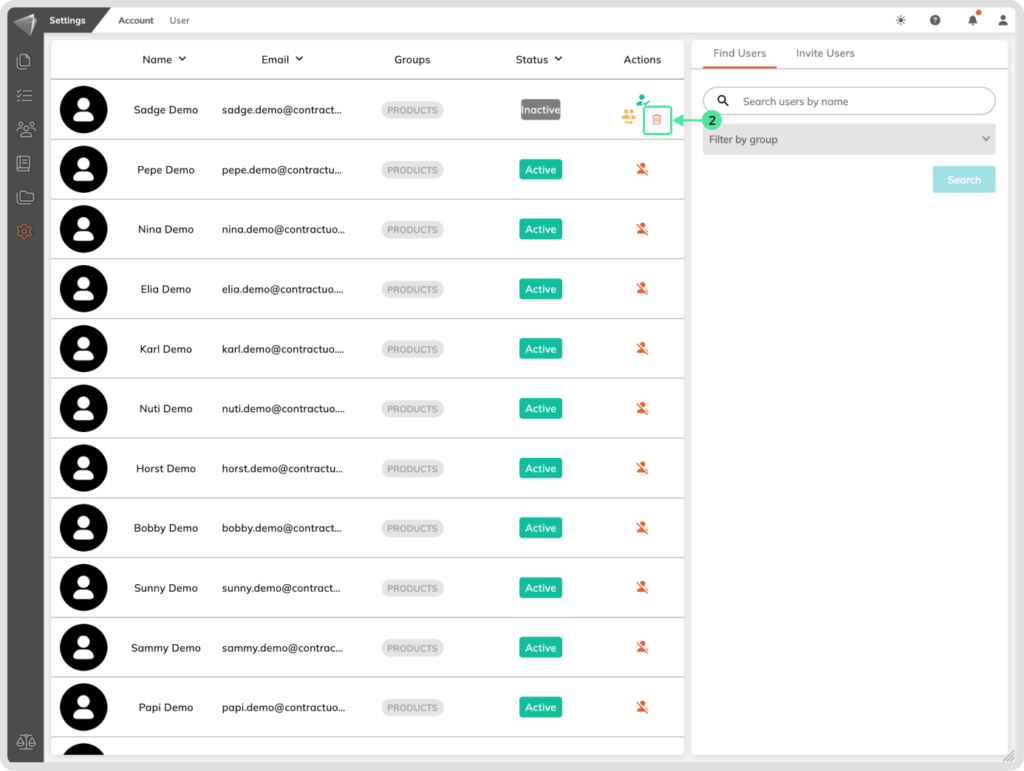
- Click on the Bin icon along the targeted user, if the user has assigned assets (documents, templates, etc.), the system will notify you. Click on the confirmation button to complete the user removal process.
How to reassign assets
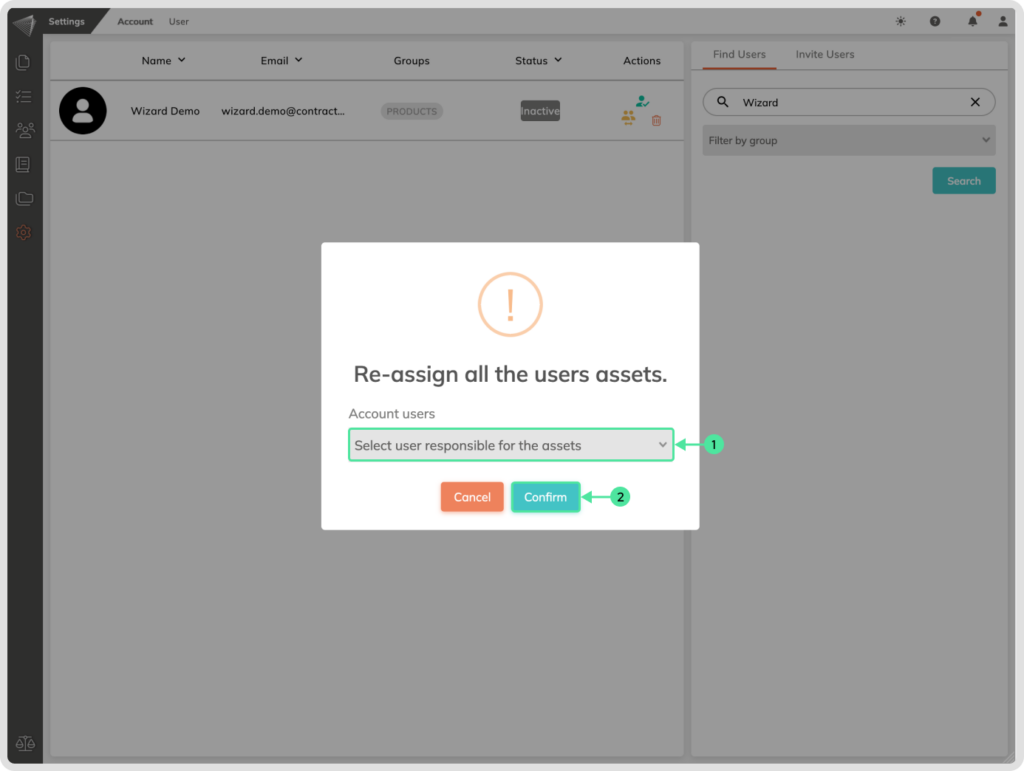
- When permanently removing a user with assets, the system will prompt you to reassign them to another user. Choose the new owner wisely!
- To reassign assets without permanently deleting a user, simply deactivate their account and click the yellow ‘Reassign User Assets’ icon.
- Click on the yellow ‘Reassign User Assets’ icon.
- Click on the ‘Reassign User Assets’ button.
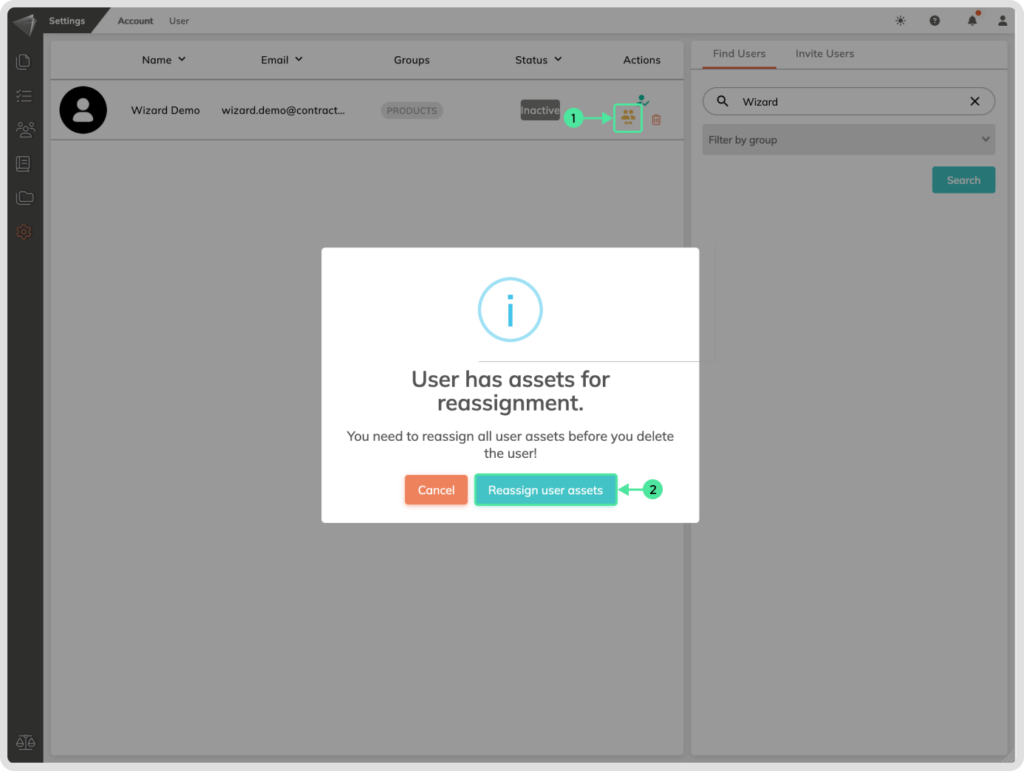
A popup will appear where you can select a user from your organization that will receive the assets.
- Select the user you want to assign the assets from the list displayed.
- Confirm your selection.
