What is it
Creating a document from blank lets you create a document without using a template or uploading a PDF. You can compare it to writing from scratch in a new Microsoft Word document.
Who is it for
Creating a document from blank can be done by all users that have permission to. It is for everyone that needs to create a document without using a template. You can of course insert text-blocks into the document.
Why create document from blank
If you don’t have a template for a document, you can create a document from ‘scratch’, called from blank.
How to create a document from blank
- Go to ‘Documents‘ and click on ‘All Documents‘.
- Click on ‘+ From Blank‘.
- On the blank sheet, you can type your text or paste copied text.
- Use the editor features in the bar to make-up the text.
- Enter a document name.
- Choose from the drop down menu named ‘Document Process Option’ whether this document needs to be signed or is a draft.
Note: If you choose ‘draft’, this document can still be edited. A drafted version cannot be send out. Editing the draft can also be done by other users that have the permission. - Tick the box ‘Code Verification‘ if you would like the recipient(s) to enter a code to see or sign the document. The recipient(s) will receive the code by email.
- Fill in the information of the receiver. Choose from the drop down menu which action is required from this user: needs to sign, will view only, will view and comment or needs to read and confirm.
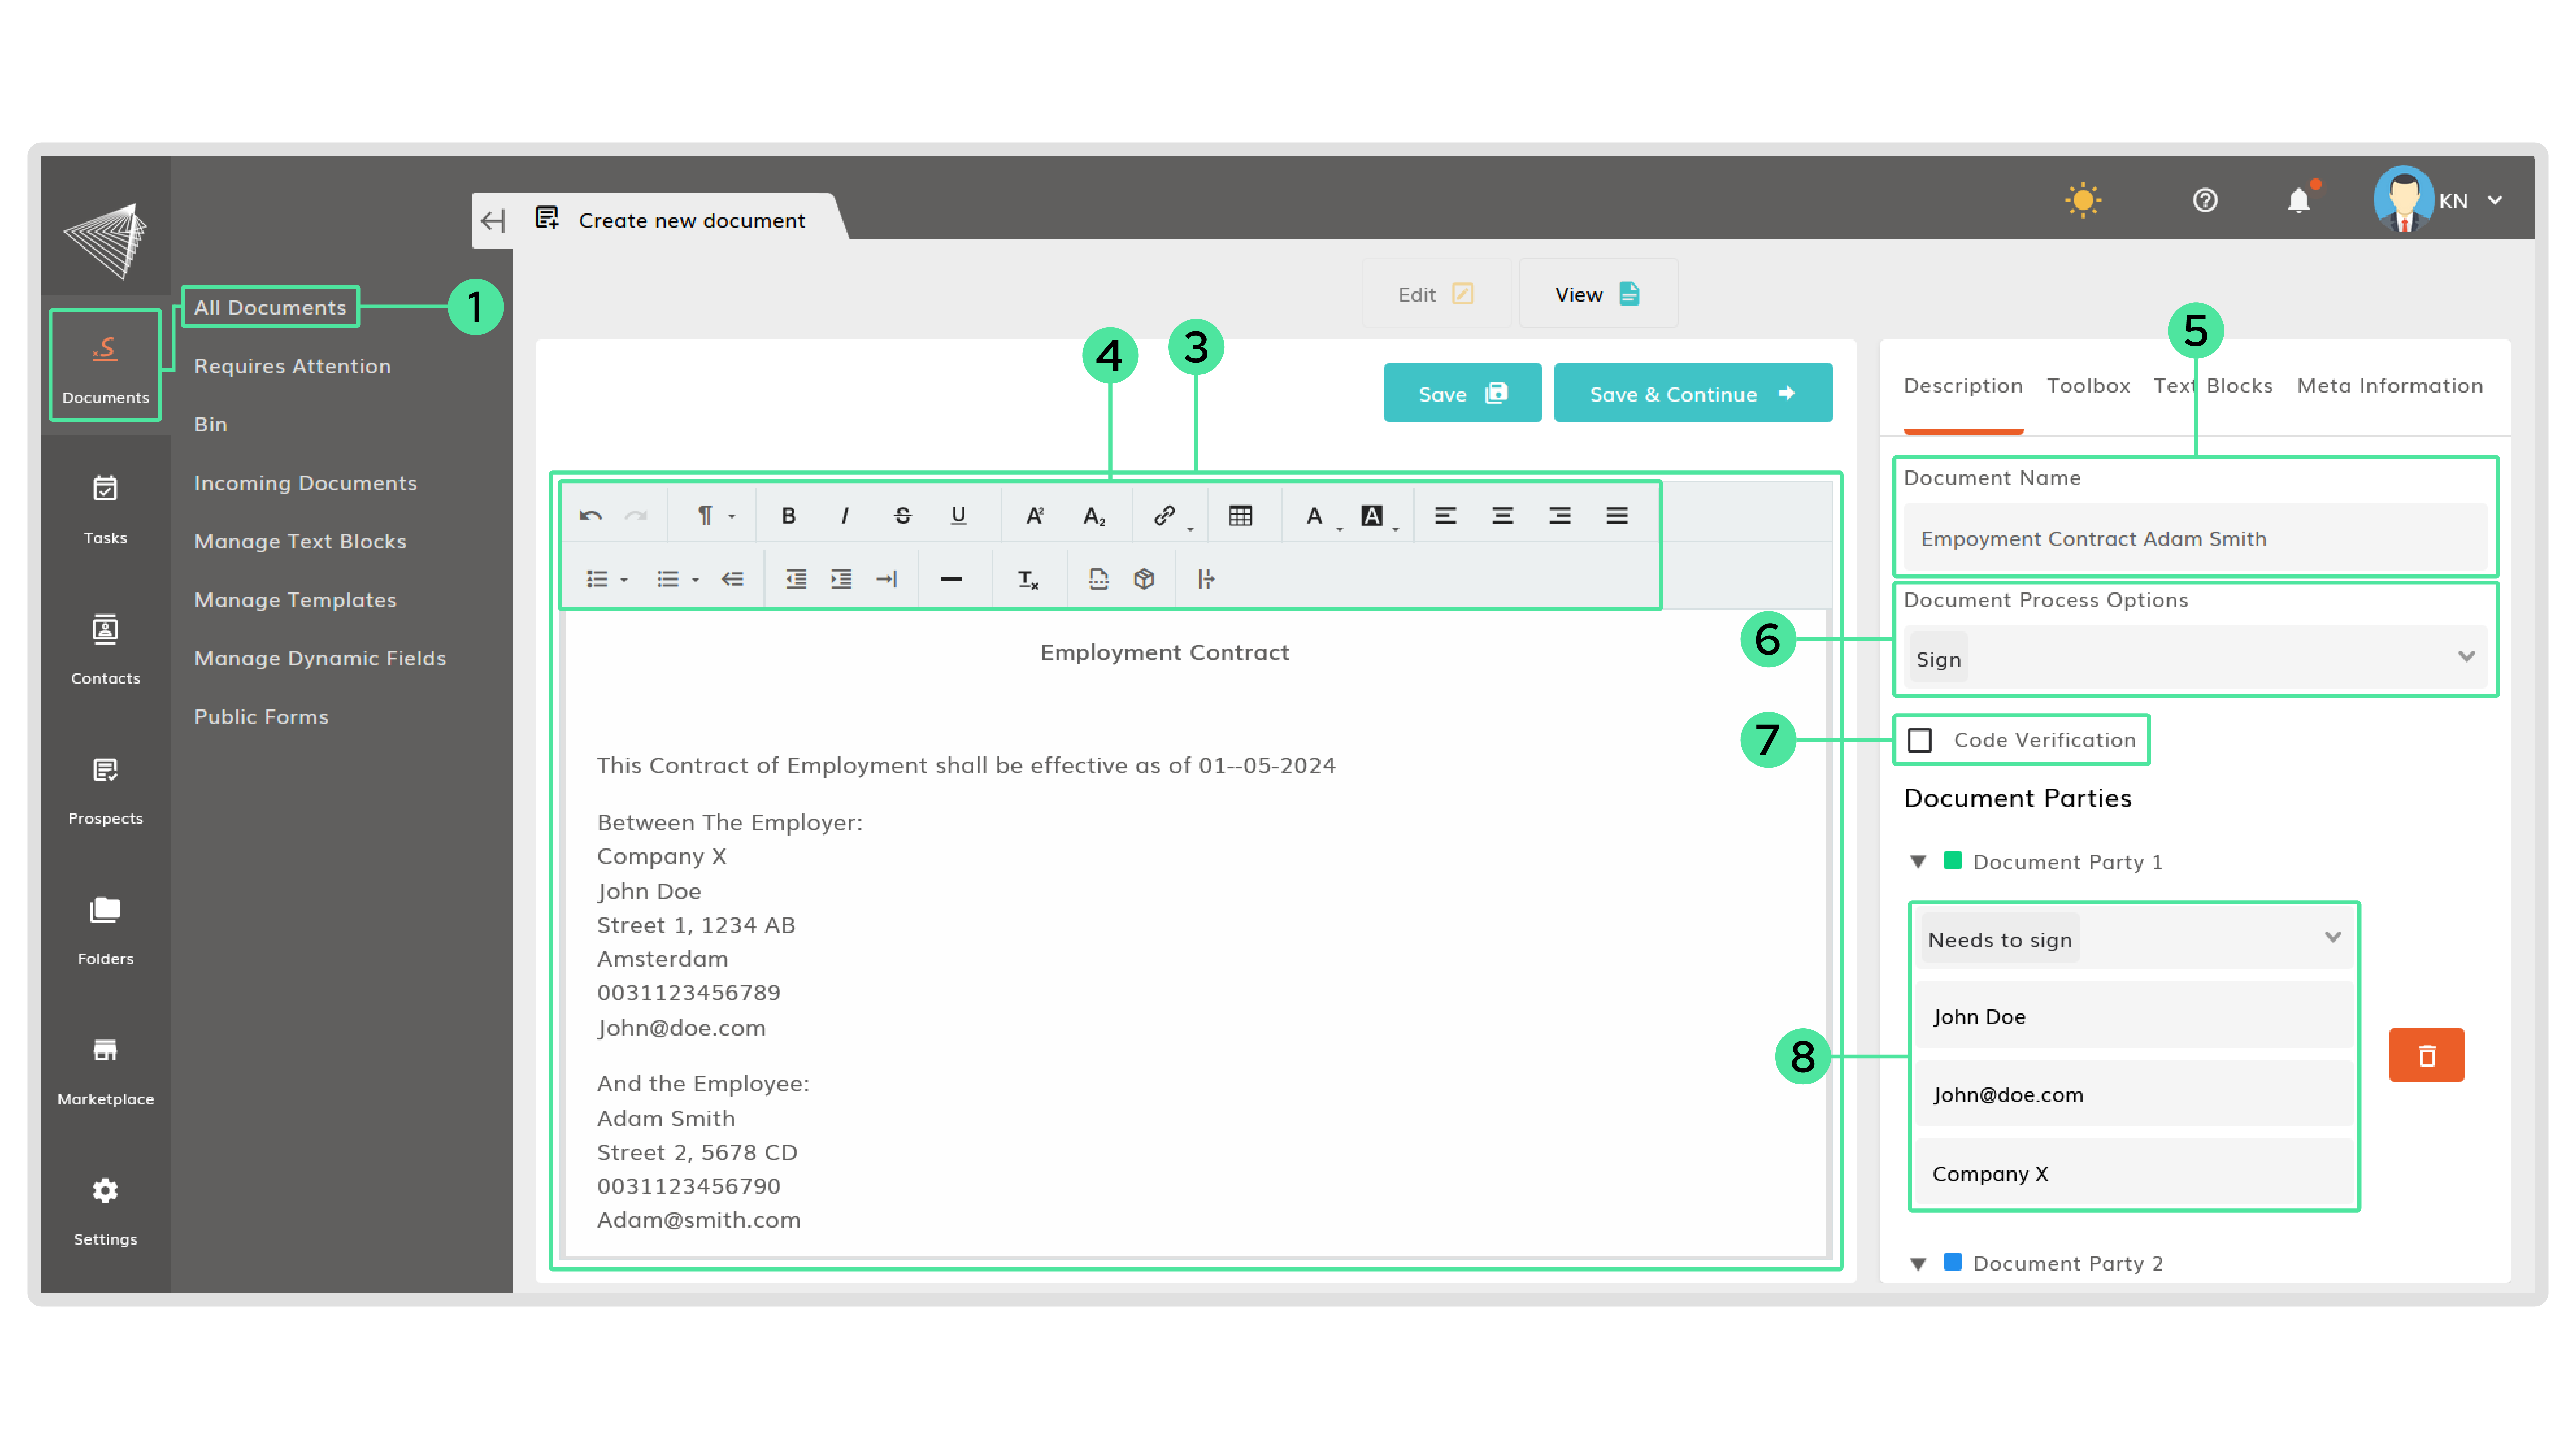
- Click on the ‘+‘ if you would like to add a receiver.
Note: It is possible to require a different action from this receiver.
Tip: You can send documents to contacts that have the same tag. Click on ‘Add Contacts By Tag’ and select one or more tags to add its contacts as receivers of this document. You can delete recipients by clicking on the bin. Also, you can change the required actions. - Fill in the information of the added receivers.
- Click on ‘Toolbox‘ at the top to add signature fields for the sender and the receiver(s).
- Click in the document where you would like to have the field and click on the field in the toolbox. It is possible to have the same fields on multiple pages or have multiple of the same fields on the same page.
Tip: You can remove a field by selecting it and press the ‘Delete’ button on your keyboard.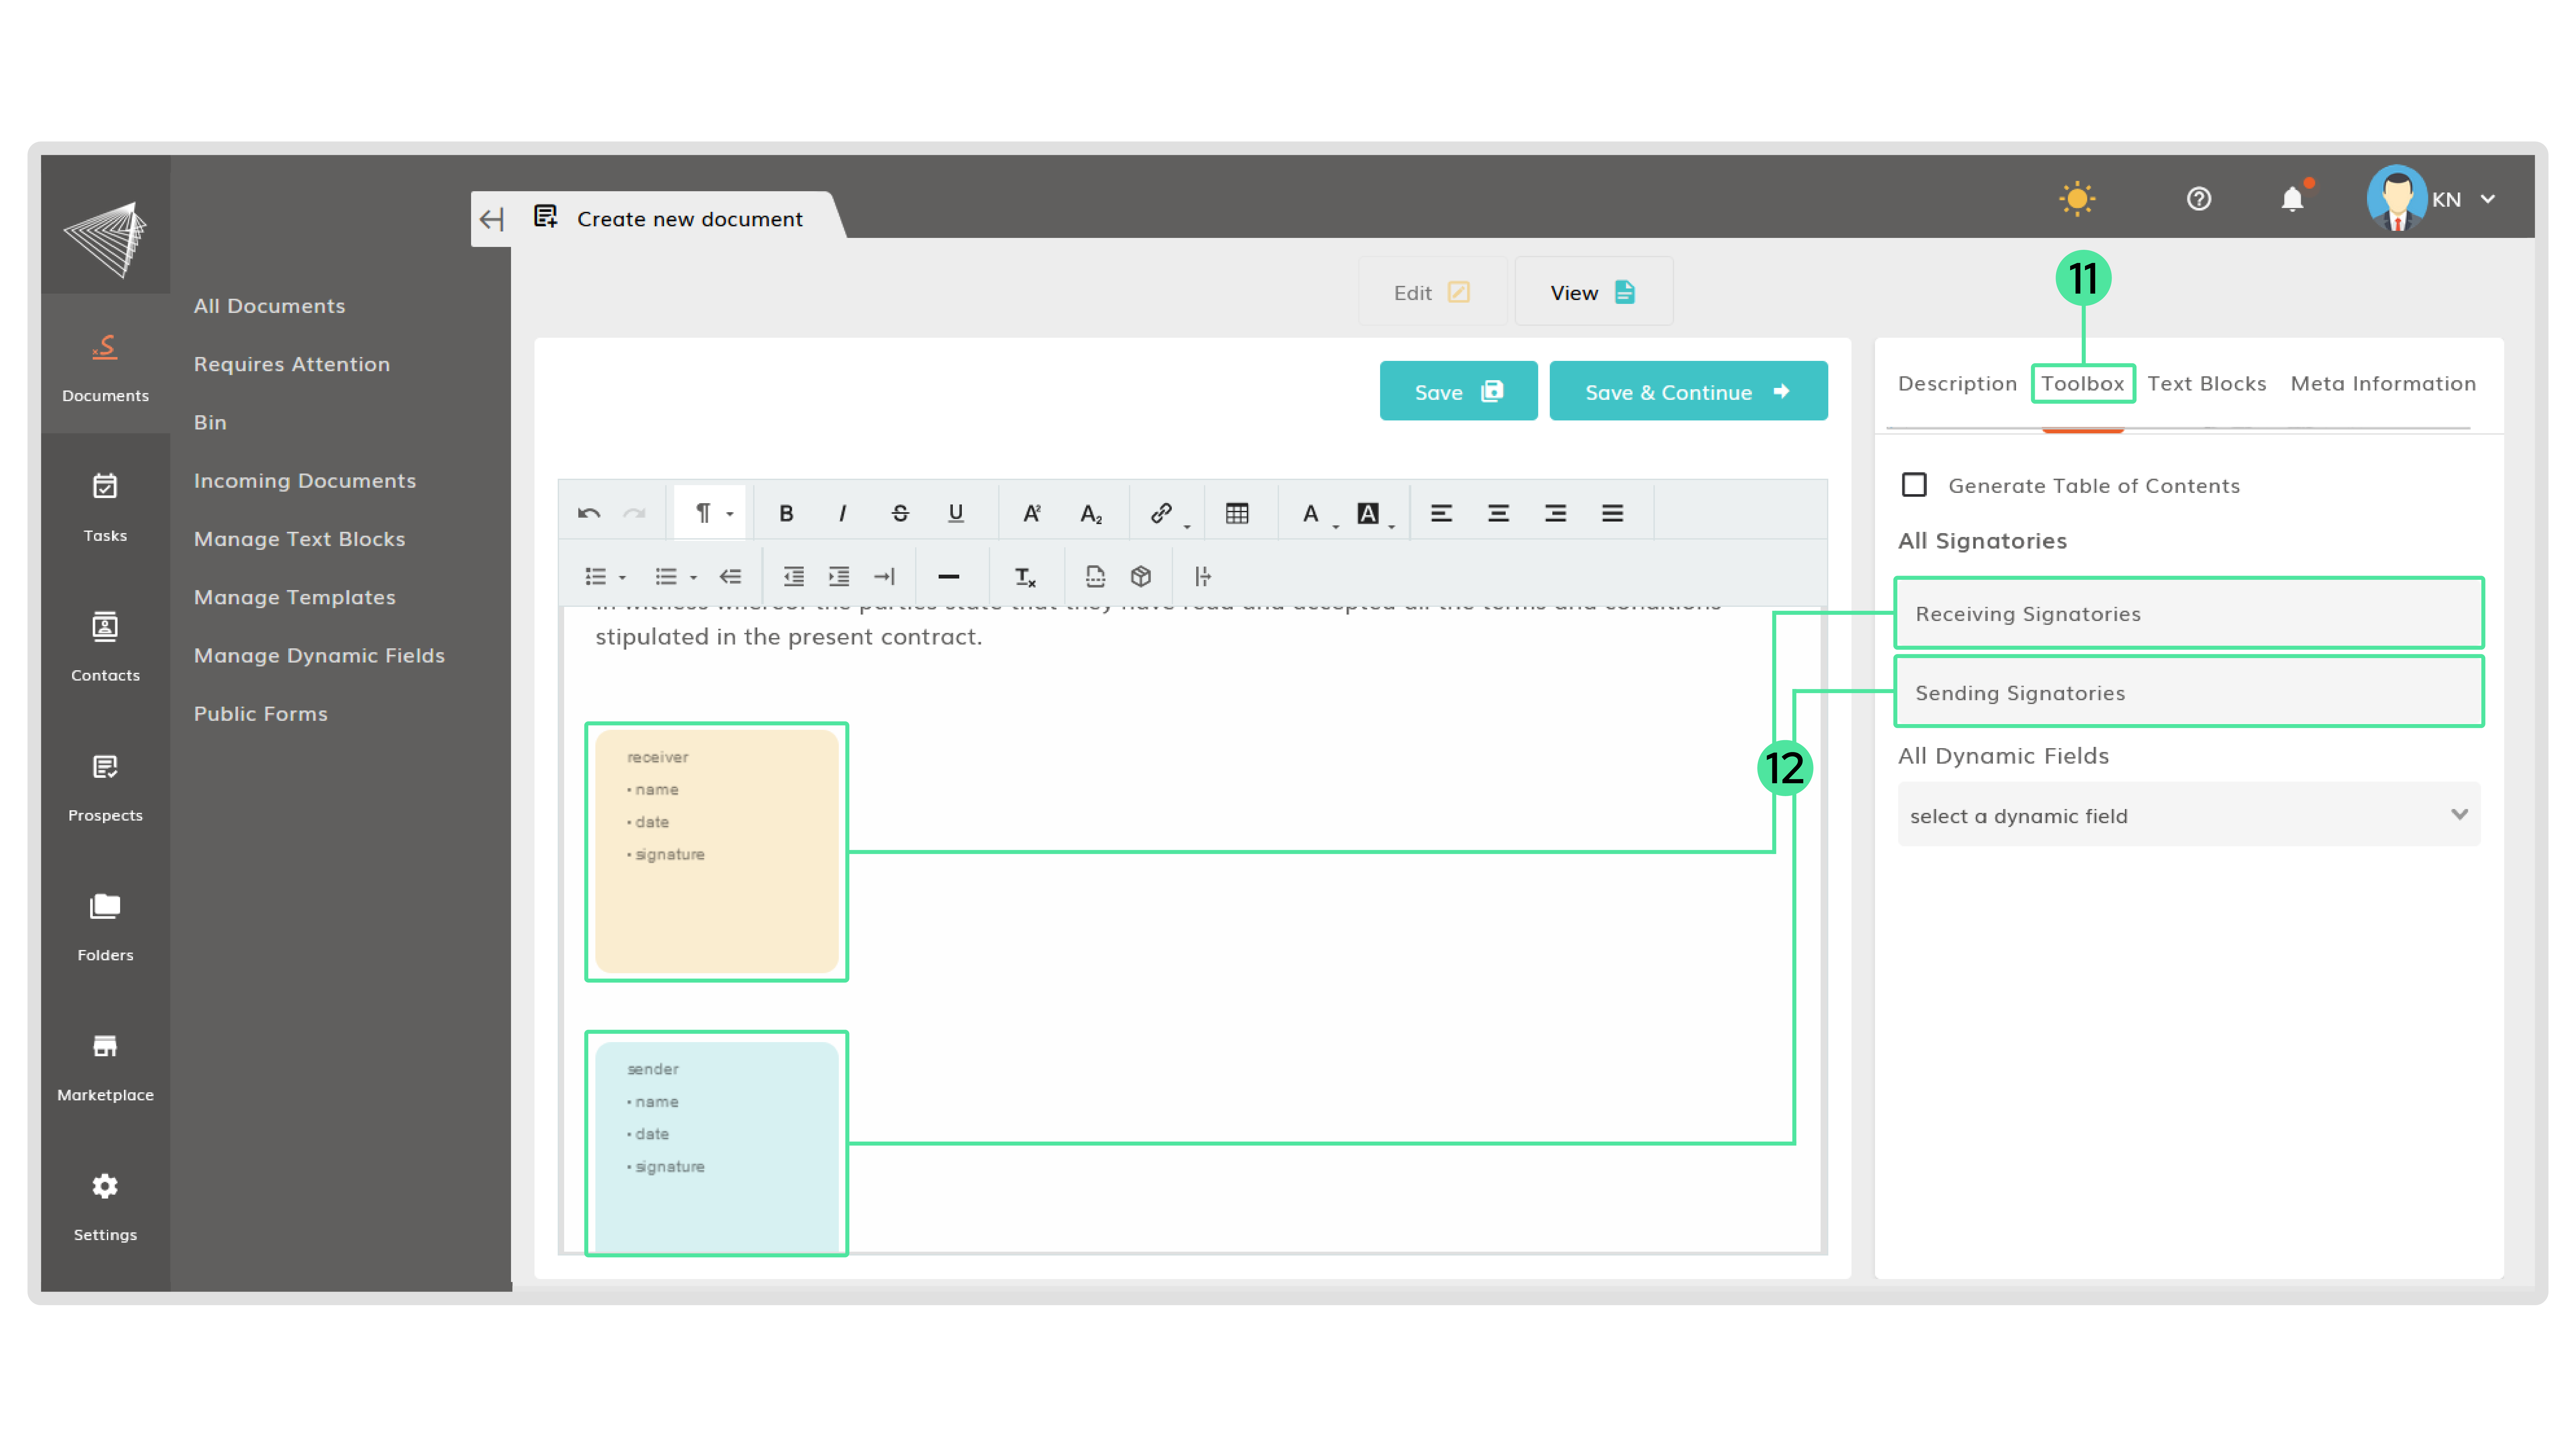
- If you have multiple receivers and you need a signature for them, add the field and click on it. Choose for who this signature field is by selecting the right receiver.
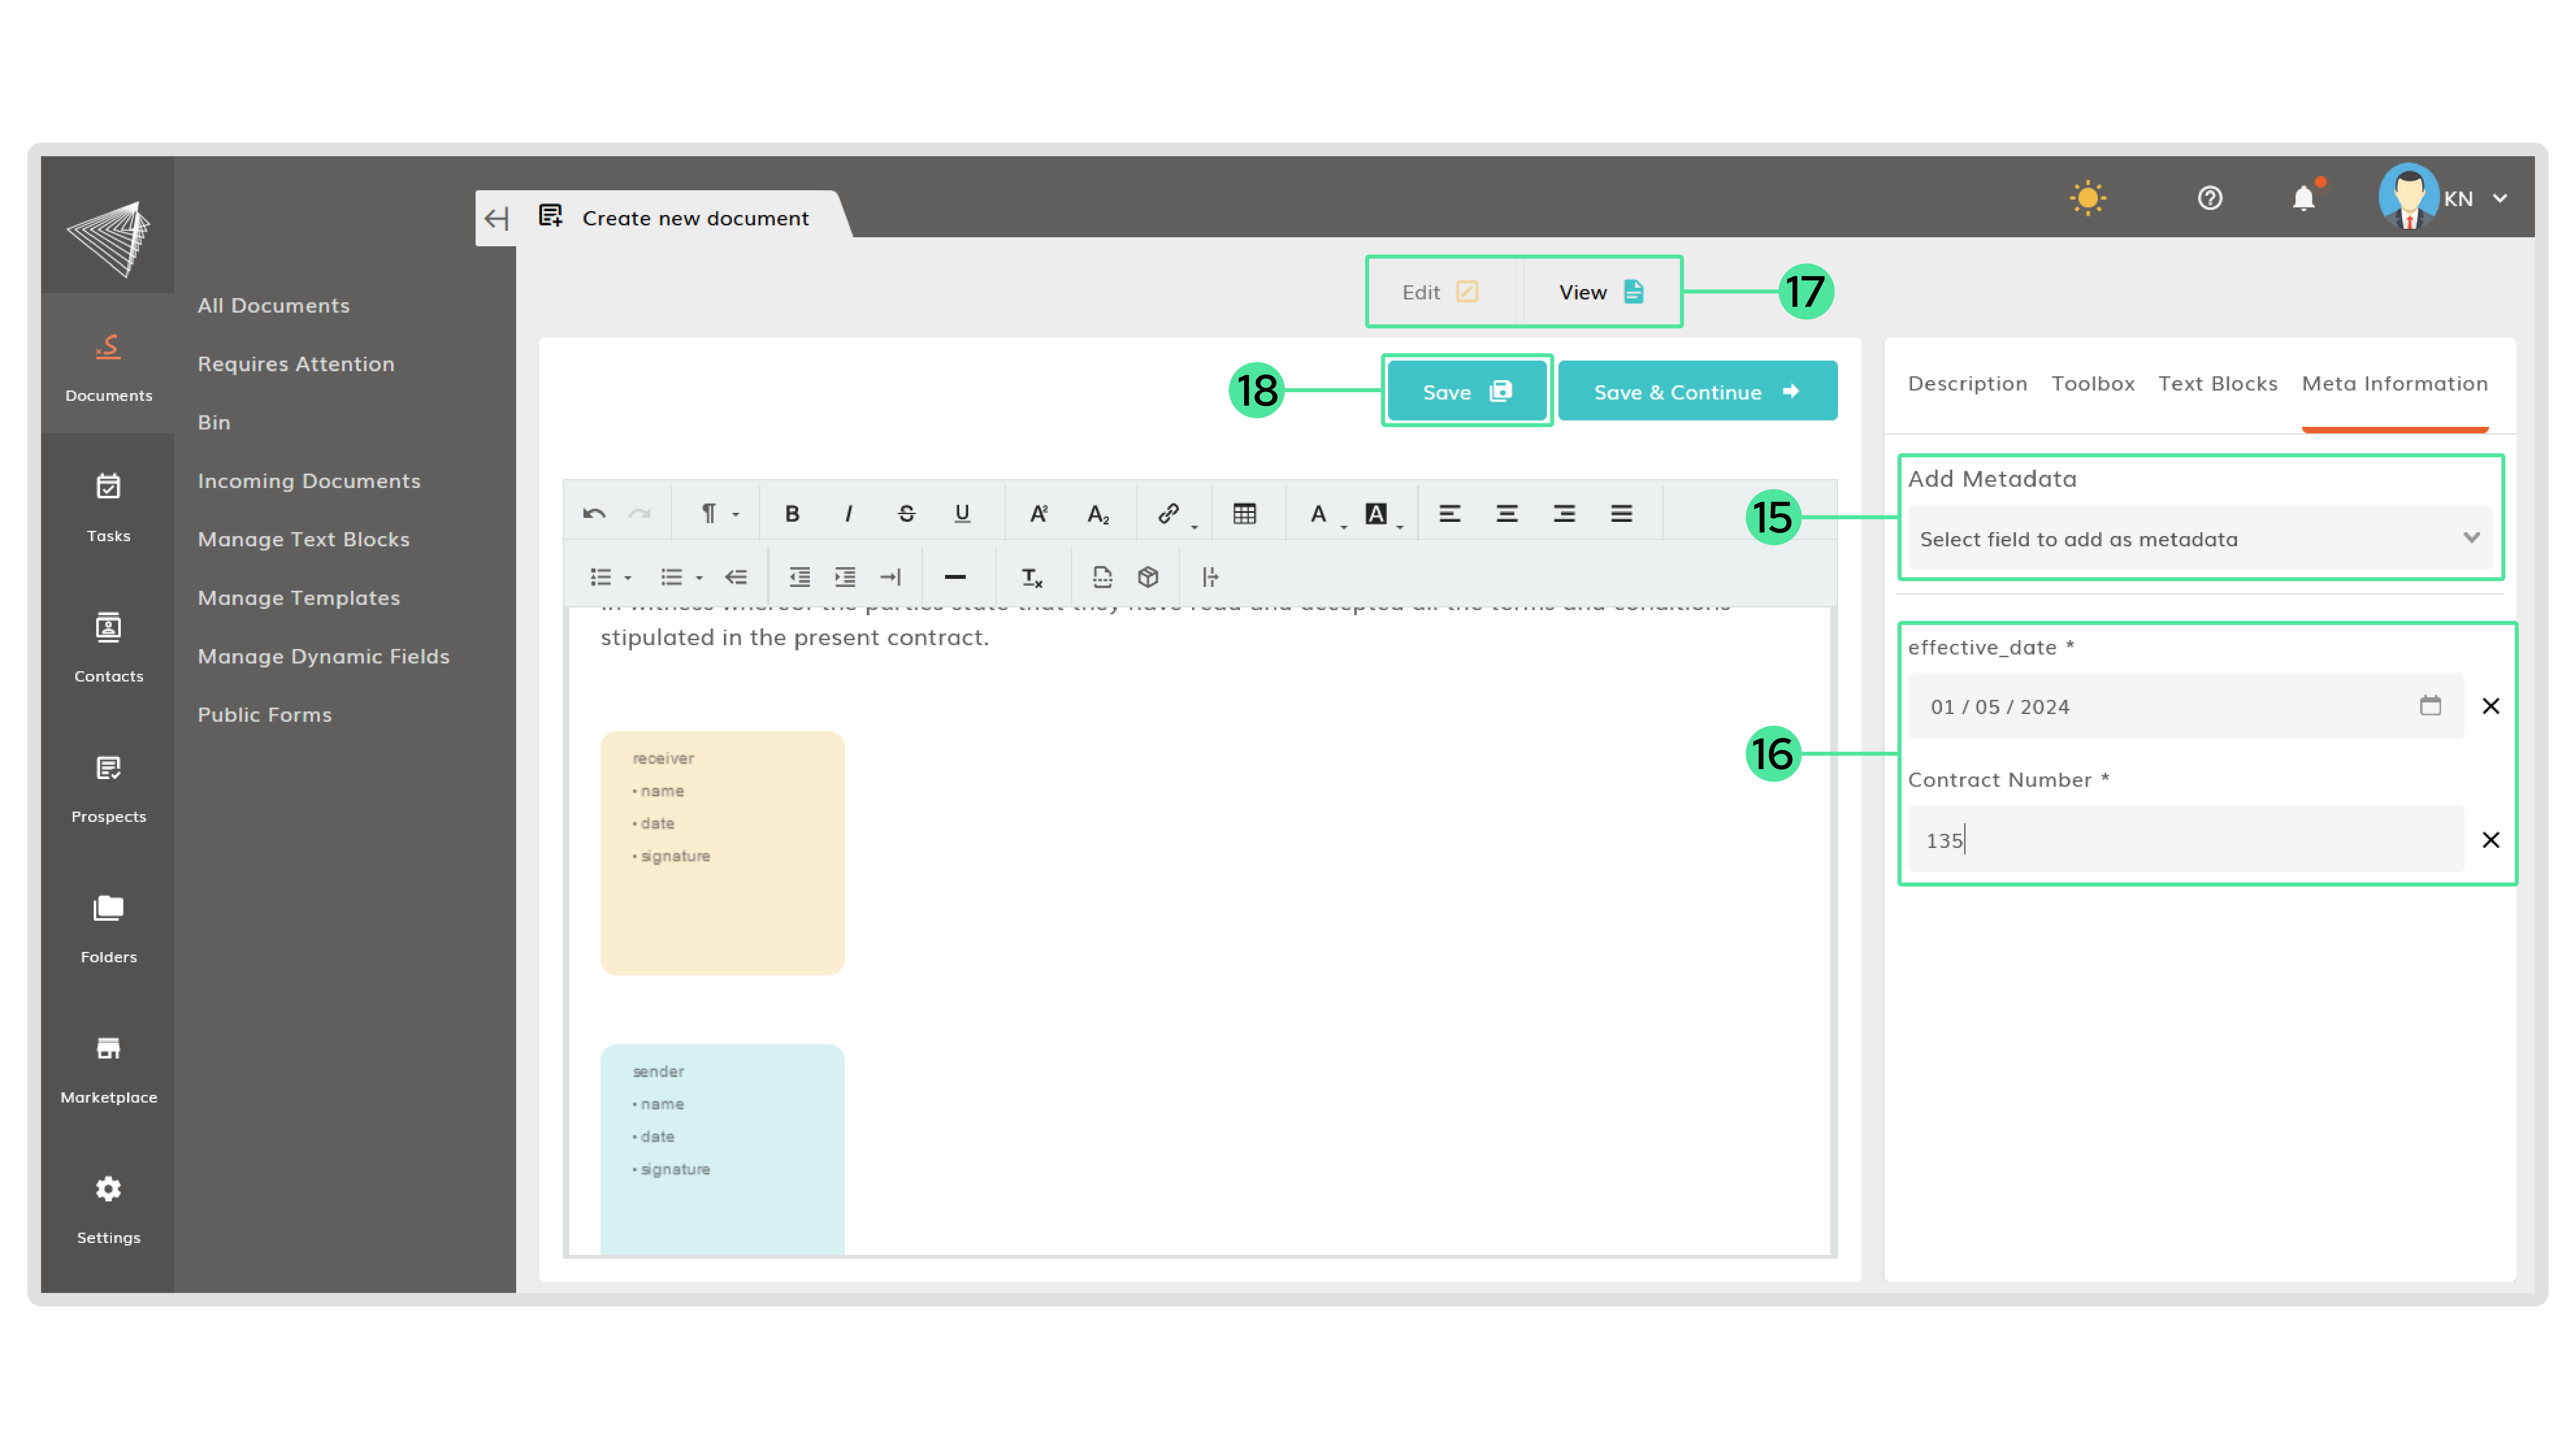
- Click on ‘Meta information‘ at the top to add metadata to this document.
Information: Metadata are additional data of a document. It’s to create more context for the document. - Click on the drop down and select the fields that you would like to use as metadata. Select as many as needed.
- Fill in the metadata fields.
- Click on ‘View‘ to see the result of the document so far. Click on ‘Edit‘ to go back.
- Click on ‘Save‘ to save the document without sending it. It will be saved as a draft.
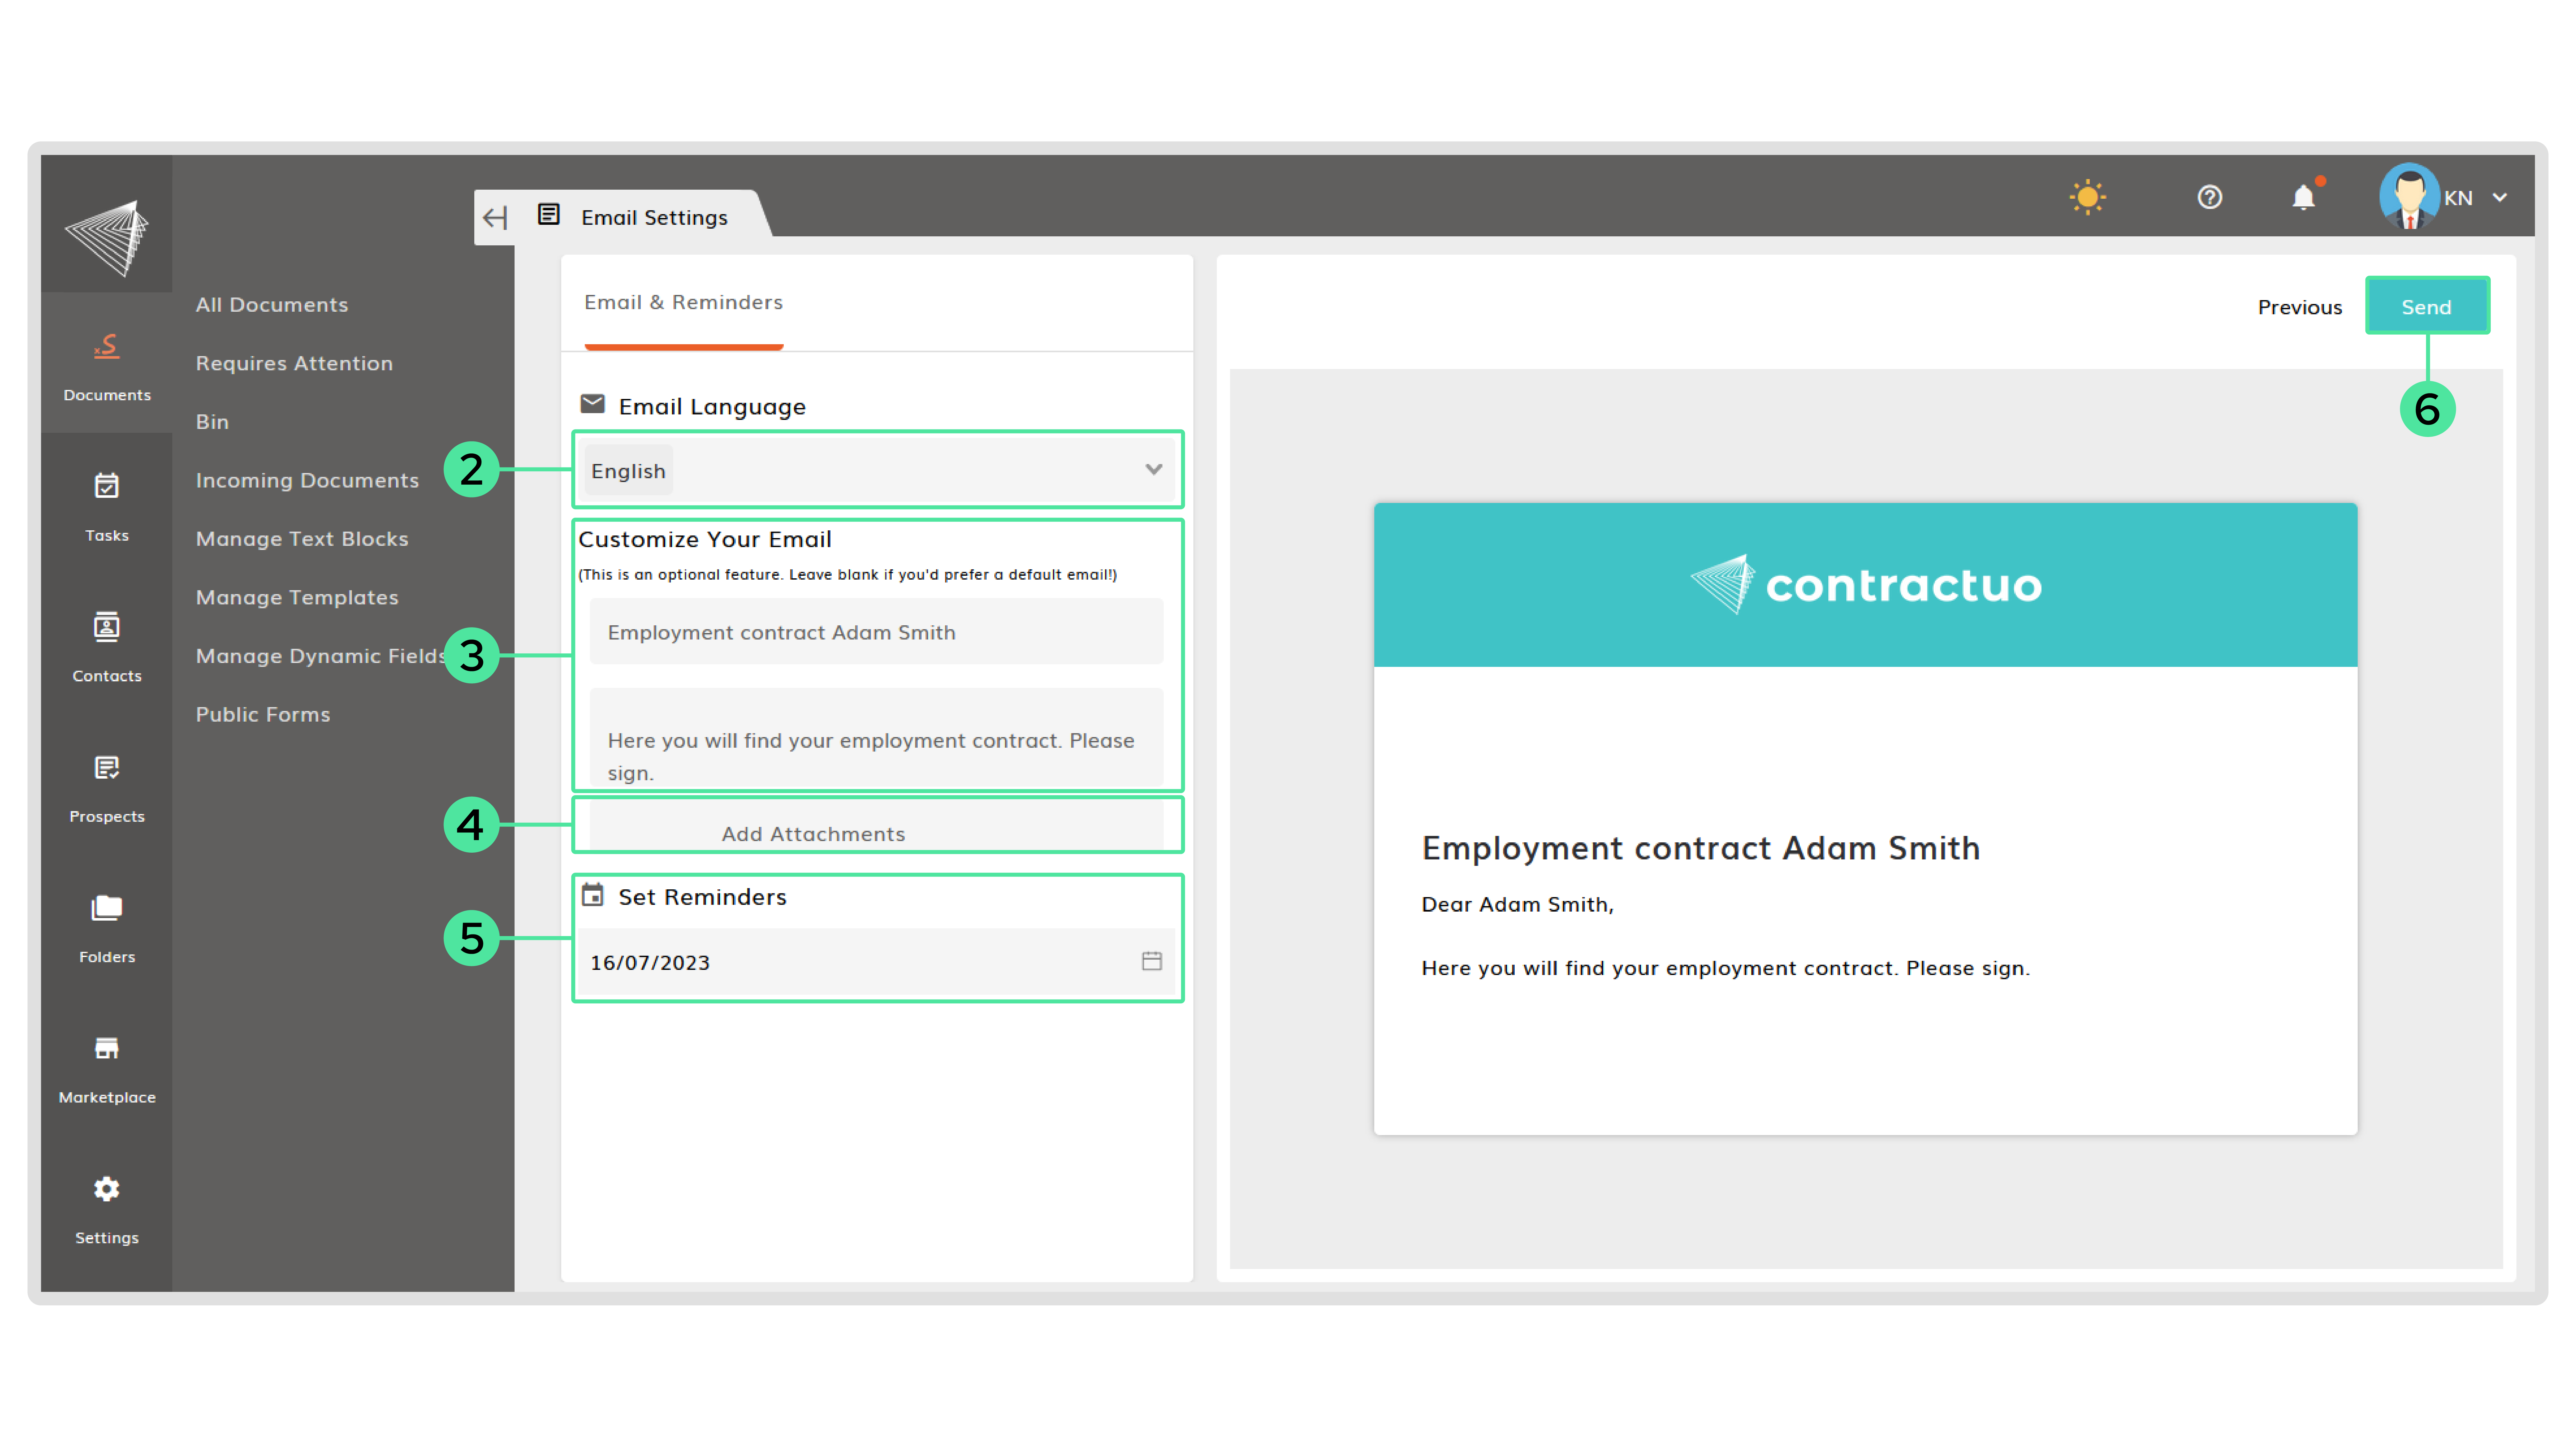
Send out the document
- Click on ‘Save & Continue‘ to send the document. Make sure to have all needed fields in the document.
- Select the language of the standard text in the email.
- If you would like to create a personalized email, start typing in field.
- If needed, add an attachment by clicking on the ‘Add Attachments‘ button and select the documents.
- Set a reminder date if you would like to get a reminder to check if all parties have completed their required actions.
- Click on ‘Send‘.