What is it
Imagine a central hub where you can effortlessly manage all your financial instruments, from SICAVs and Funds to Mutual Funds and Umbrella Funds. That’s exactly what contractuo’s Product Management feature delivers. This meticulously crafted solution houses all your essential documentation, dynamic forms, and critical data, ensuring regulatory compliance and smooth sailing.
Say goodbye to cumbersome processes and hello to effortless updates! Our intuitive design allows you to seamlessly position dynamic content whenever needed, keeping your information accurate and readily accessible.
Who is it for
Whether you’re a fund manager, financial analyst, compliance officer, or administrator, contractuo’s Product Management feature is your secret weapon. Its precision engineering caters to the unique needs of financial experts, providing a strategic edge to navigate the complex world of financial instruments within the platform.
Why use it?
With contractuo, crafting financial products becomes a breeze. Say goodbye to meticulous spreadsheets and scattered documents. Our feature ensures meticulous accuracy, regulatory conformity, and systematic organization, making information retrieval and updates a breeze.
But it doesn’t stop there! Dynamic information becomes your friend, not your foe. We simplify its use and alteration, boosting your efficiency and streamlining your work processes. More time for what matters, less time battling complexity.
Ready to unlock the power of contractuo’s Product Management?
Here’s what you need:
- Access to the Prospect Module: Make sure you have the Prospect Module unlocked.
- Editing Permissions: Take control and create, edit, and modify products with the right permissions.
- Pre-Built Components: Get faster with pre-created Forms, Form Types, Blueprints, Text Blocks, Form Fields, and RTS Templates.
- Complete Templates: Accelerate your product setup with ready-made Templates.
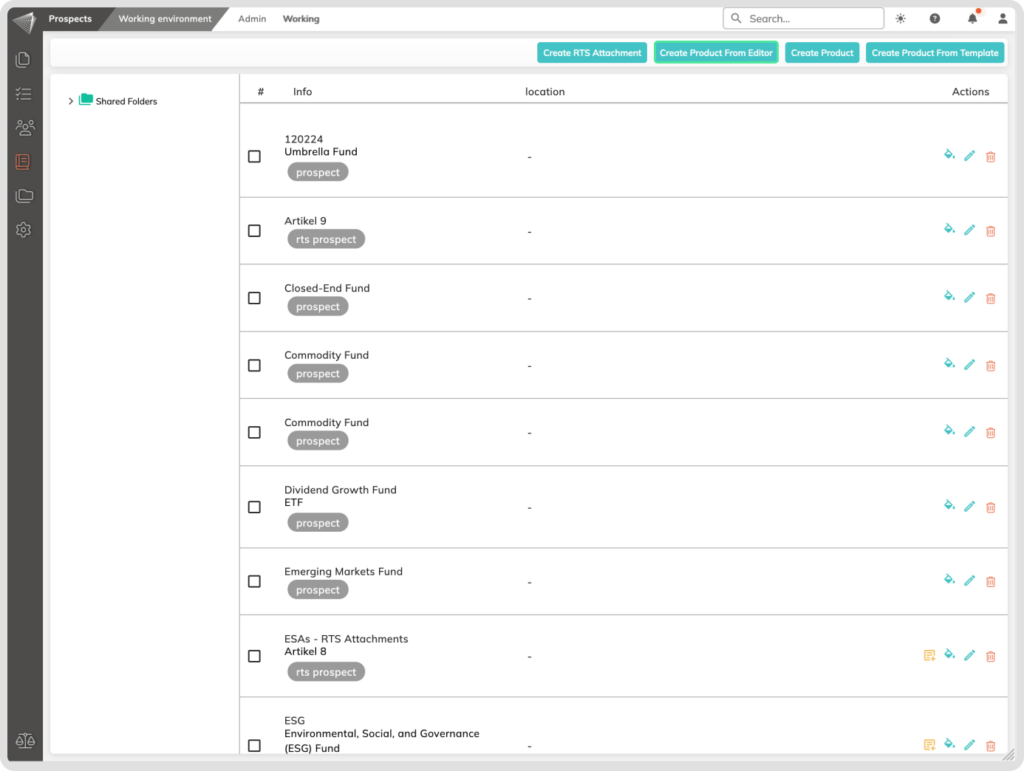
How to find the Products?
This function is integral for users who need to tailor financial products to specific markets or regulatory requirements.
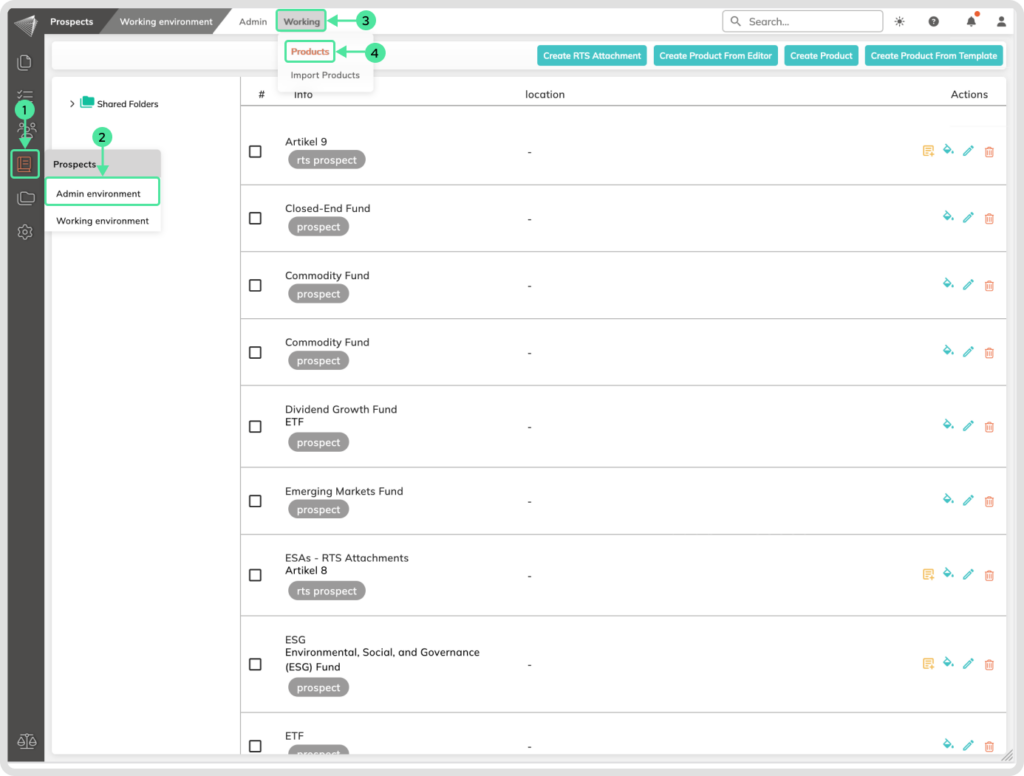
- Go to the Prospect Module.
- Select the Working Environment.
- Click on the Woking menu.
- Select the Products.
To initiate a new financial product, click on the “Create New Product” button. This will open a template where you can input essential details and configure forms according to the product’s needs.
How to Create a New Product
Go to the Prospect Module and select the Working Environment. Click on the Woking menu and select the Products.
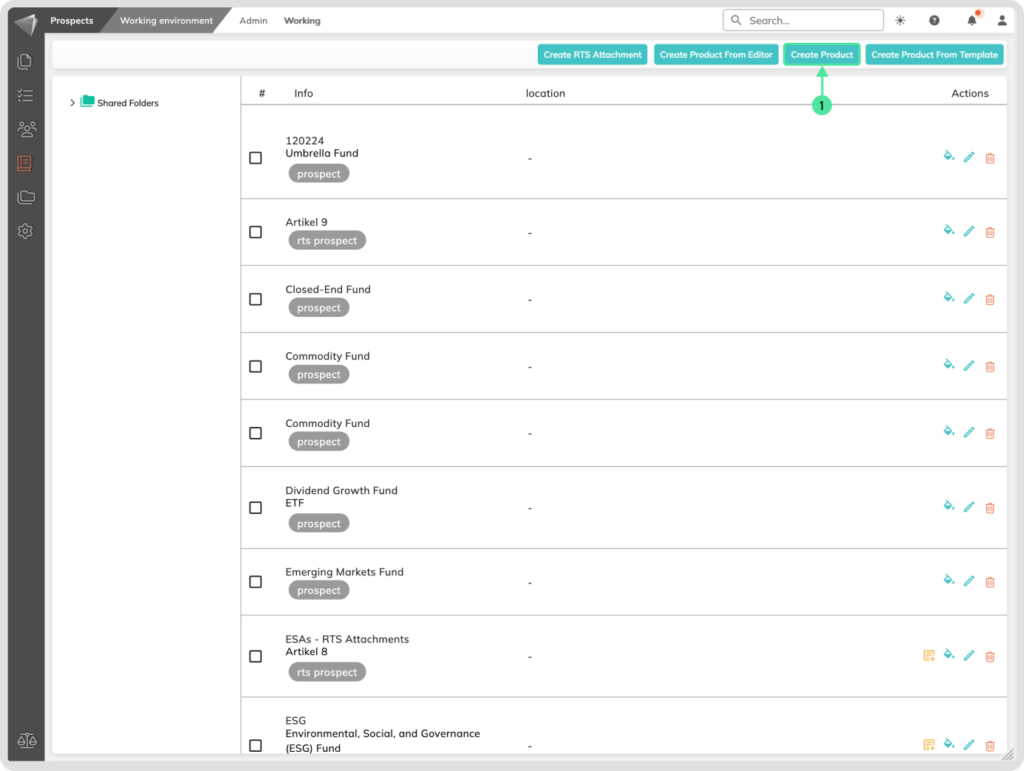
- Click on the ‘Create Product’ button.
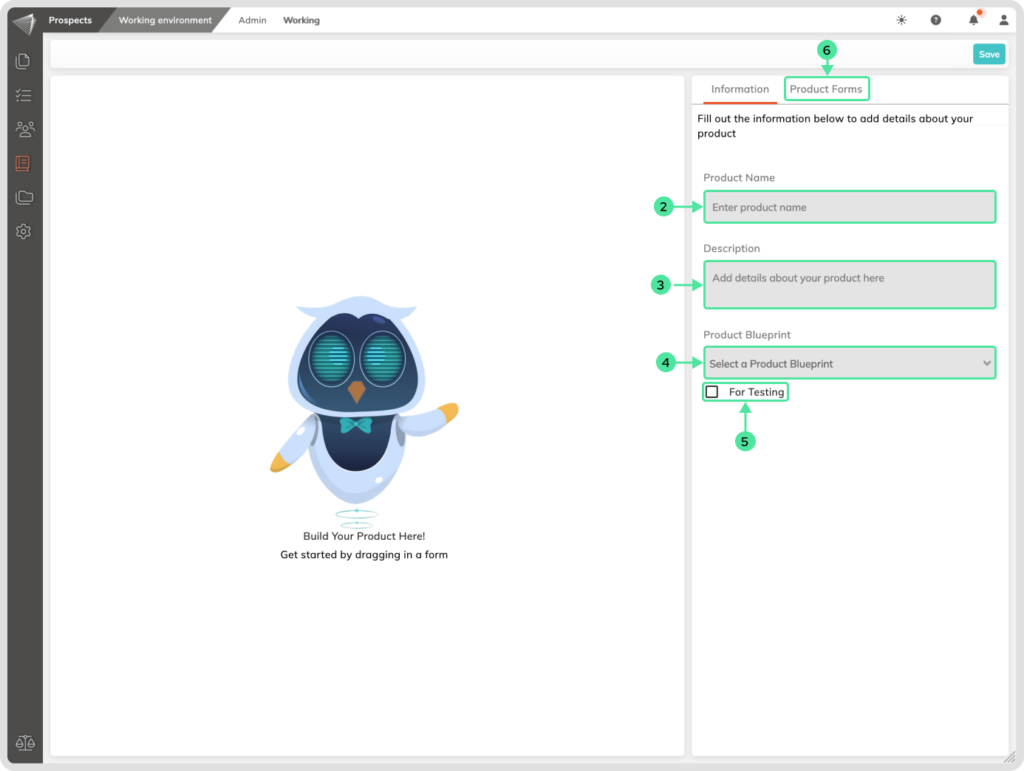
- Add a unique descriptive Name to the Product.
- You can implement a Description that can summarize the purpose of the product.
- Select a Blueprint from which you can choose Forms to drag into your product. You can also switch the Product Blueprint from here, allowing you to interchange Forms to meet your specific requirements.
- Optionally, you can tick the checkbox to create a product for testing purposes.
- Navigate to the Product Forms to view the forms contained within the selected Blueprint.
Product Forms Sidebar menu
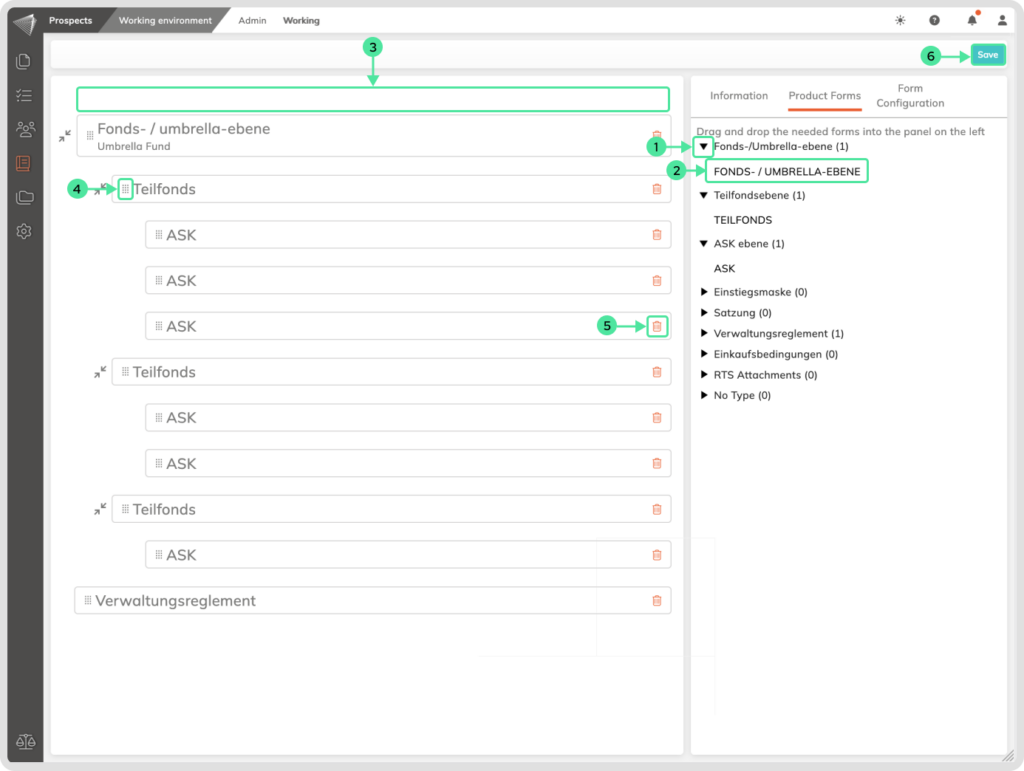
In the Product Forms section, you have the flexibility to choose from existing forms included in the selected Blueprint. Simply drag and drop them to the left side and arrange them to suit your preferences. By positioning a form slightly to the right under an already added form (nesting it under the other form), you create dependencies. This means that the display of a secondary form is contingent upon the user’s selection of the primary form. You can create a hierarchy by setting dependencies up to three layers deep, offering you greater customization and control.
- Click the arrow next to each Form Type to see the available Forms within.
- Pick the Forms you want to include in your Product.
- Just drag and drop them onto the left side. Remember, you can add multiple Forms.
- Drag & drop Forms to craft multi-level workflows, nesting them under each other to build hierarchies for a seamless user experience!
- If needed, delete Forms from the Product. Be aware that deleting a main Form also removes its nested ones.
- After making all your changes, click ‘Save‘ to ensure your updated Product is ready.
How to Create a New Product from the Editor
Go to the Prospect Module and select the Working Environment. Click on the Woking menu and select the Products. Click on the ‘Create Product Form Editor’ button
The editor function empowers users to craft a product with a hands-on approach, It is particularly advantageous for customization at a granular level, providing the flexibility to incorporate complex terms and conditions specific to financial products.
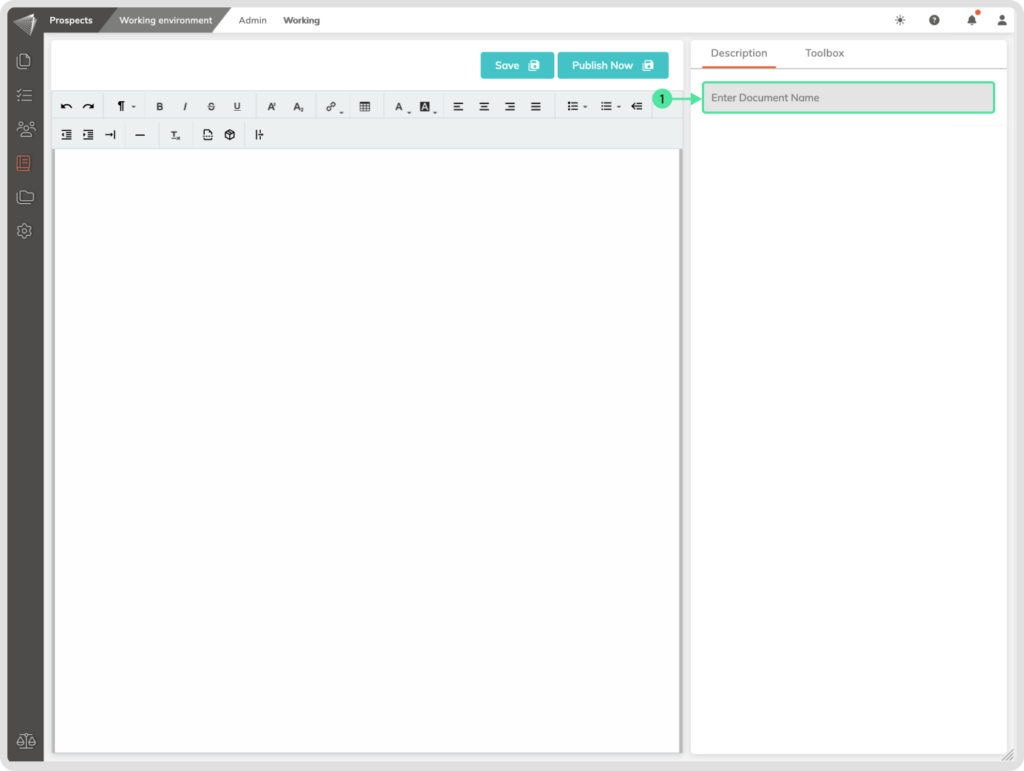
- Enter a descriptive Name to the Product.
Toolbox inside the Editor
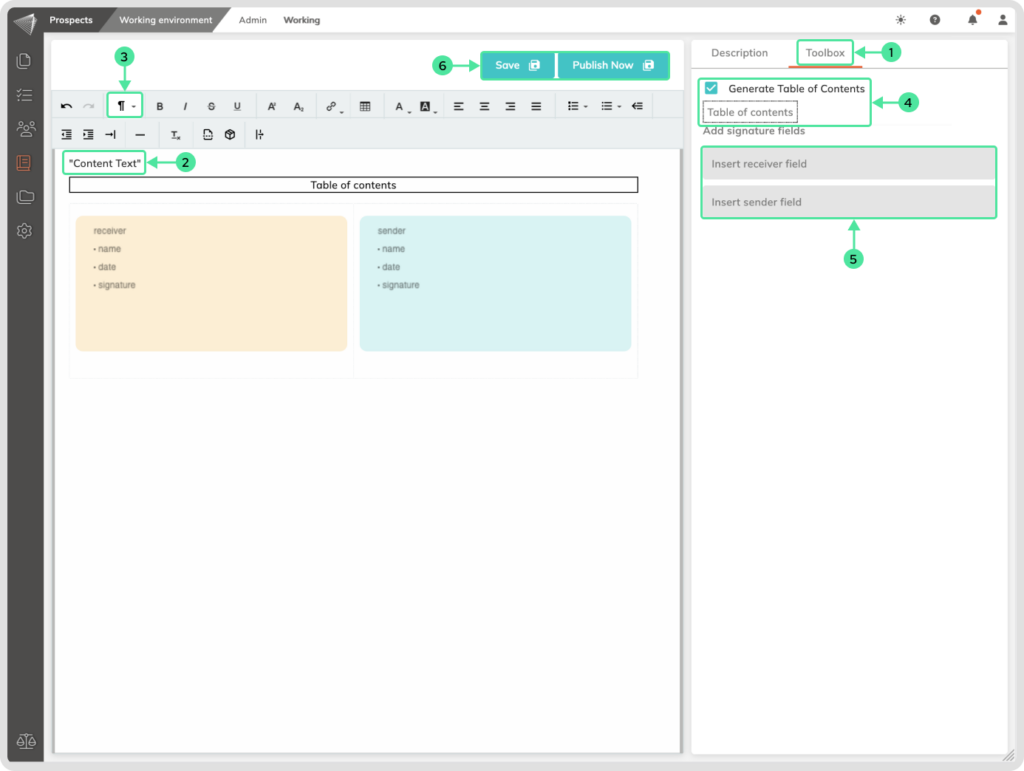
- Go to the Toolbox in the Sidebar.
- Add your content inside the editor field.
- In order to include Tables of Contents, you will need to make at least one Header.
- Tick the checkbox for the Table of Contents, and drag and drop it inside the editor.
- Add Signature fields, when needed.
- Save as a draft or Publish your work directly.
How to Create a New Product from a Template
This function offers the convenience of using existing templates, saving time, and ensuring consistency across similar financial products. It mitigates the risk of errors in data entry and helps maintain uniformity in product structure.
Go to the Prospect Module and select the Working Environment. Click on the Woking menu and select the Products.

- Click on the ‘Create Product Form Template’ button.
- Select a Template that you want to use.
- Click on the Create Product Form Template button.