What is it
The Four Eyes Principle (4EP) is a powerful tool within contractuo designed to enhance reliability and security within your organization. By requiring review and approval by two individuals, it safeguards critical actions and changes, minimizing errors and omissions.
Who is it for
Teams prioritizing accuracy: Legal, finance, and compliance departments can leverage the 4EP to uphold strict quality standards and ensure meticulous document review.
Users with approval authority: Individuals responsible for approving actions within the platform gain an extra layer of security and confidence in their decisions.
How does the 4EP work?
Think of the 4EP as a double-check for important changes. The Administrator turns it on and then designates teams (like legal or finance) to review specific areas. When you make a change needing approval, you choose someone from the relevant team. They’ll review it, and either approve (green light) or reject (red light) with a comment. You’ll both be notified of the decision, and everything is tracked for clarity. It’s like having an extra pair of eyes to ensure accuracy and security. The 4EP can be implemented for the following platform areas: Contacts, Text Blocks, Forms, Blueprints and Products
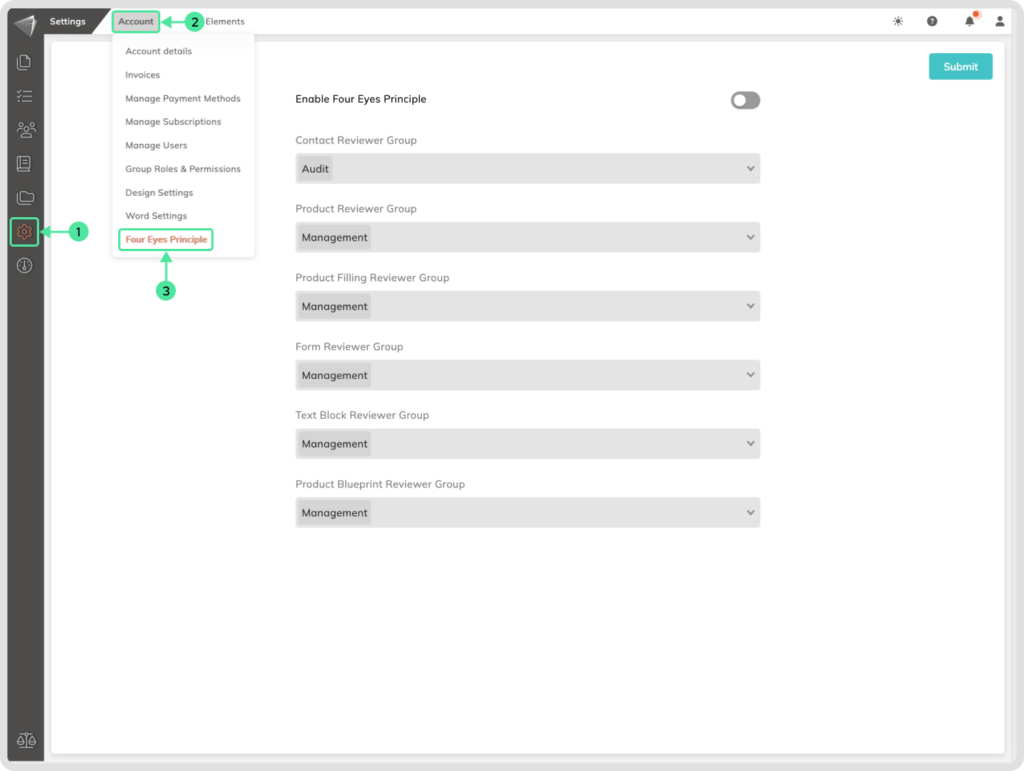
How to find the Four Eyes Principal
- Go to the Settings Menu.
- Access the Account Menu.
- Select the Four Eyes Principle submenu.
How to activate the 4EP
Go to the Settings Menu. Access the Account Menu and select the Four Eyes Principle submenu.
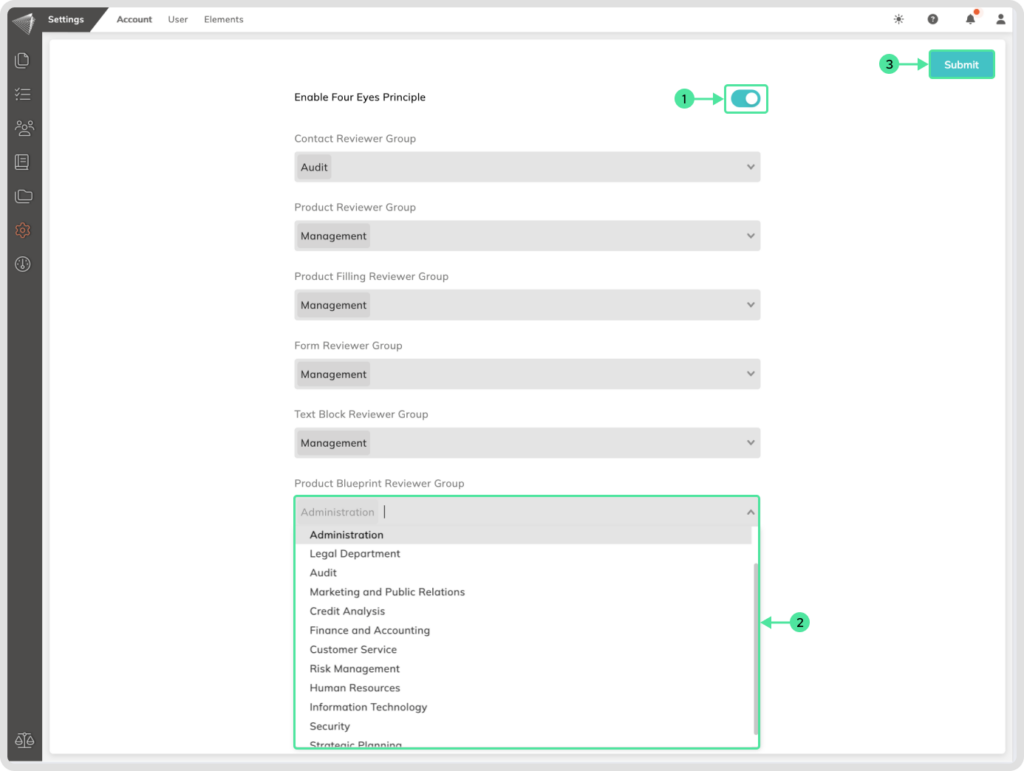
- Start by clicking on the “Slide Button” (slide it to the right) in the top right corner. This will enable the groupe selecting function.
- Assign Responsibilities by choosing the “responsible group” for each area, that should handle the 4EP requests. You can find these groups listed in the platform’s “Groups Roles and Permissions” section.
- Once you’ve assigned responsibilities to all areas, click on the “Submit” button to save your settings. This ensures your selected groups are notified and ready to action the 4EP requests.
Need to turn off 4EP? Here’s how:
Follow the same steps you used to activate it, but slide the button in the opposite direction (now to the left!). Remember, you can only deactivate 4EP when there are no open applications currently in process.
Need to change the responsible person for 4EP requests?
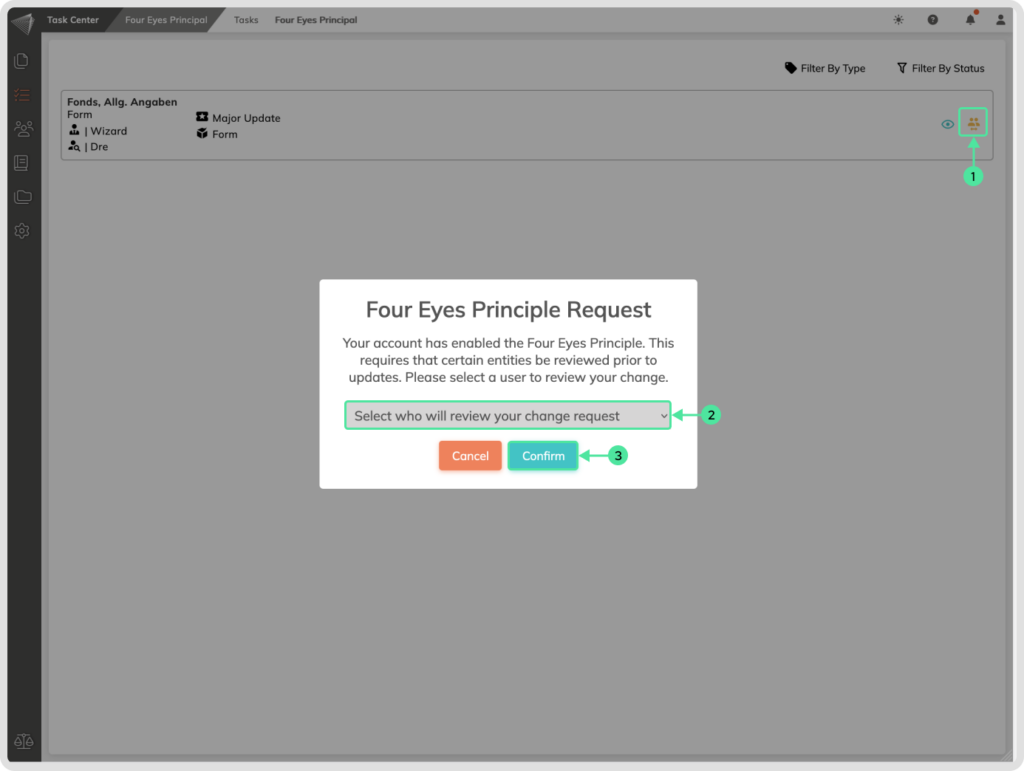
Head to the “Tasks” menu and choose “View your Requests” in the submenu. From there, you can easily swap the assigned member. Here are the detailed steps:
- Locate the “Exchange Responsible Person” icon. Look for two figures with a yellow, double-headed arrow icon, that is situated on the right side at each request.
- Choose a new team member from the dropdown list. It’ll pop up right after you click the icon.
- Finalize your selection by clicking on the ‘Confirm‘ button.
Ready to launch a 4EP? Let’s do it!
Remember, you can use 4EP to review changes in Contacts, Text Blocks, Forms, Blueprints, and Products. Just make your edits and save them. Voila! A pop-up will appear, allowing you to choose the team who’ll handle your request.
Your chosen team will be notified automatically and can readily access the request in their “Review Request” submenu under the “Tasks” menu.
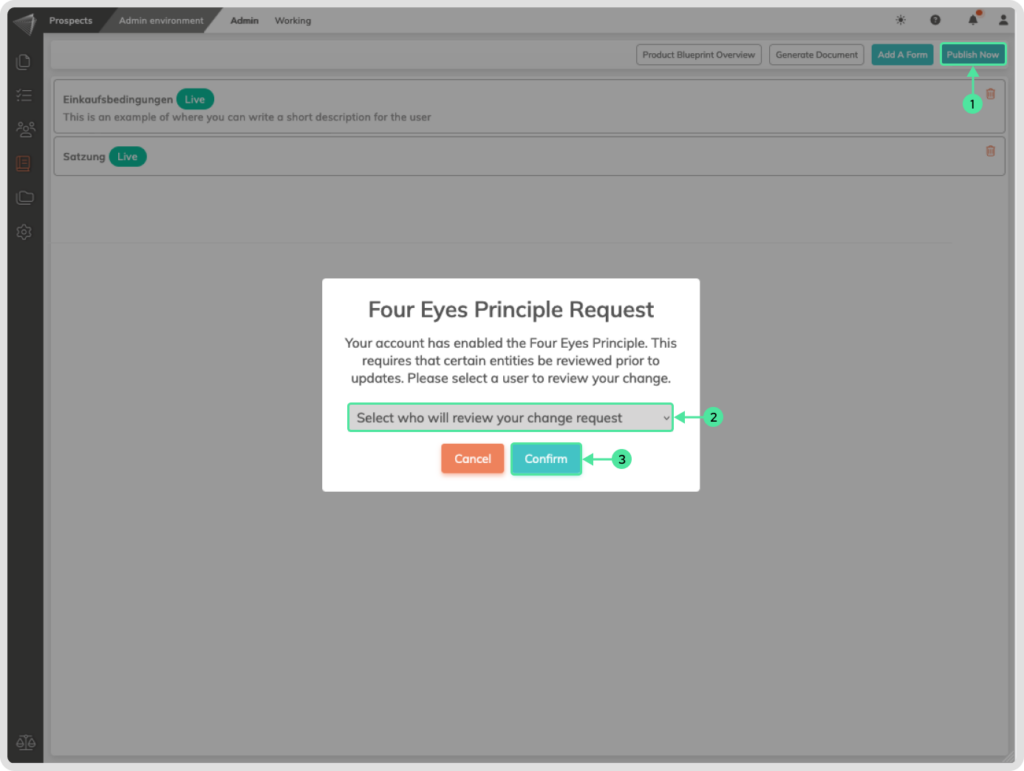
Here’s a quick peek at what you’ll see when saving changes within a Blueprint. Need more Blueprint know-how? Click here.
- Go to the Prospect module in the Admin environment, click on the Admin menu and select the Blueprints. Select your desired Blueprint and click on the ‘Edit content’ icon. Make the necessary changes to your Blueprint and click on the ‘Publish Now’ button.
- A pop up will appear after you click the ‘Publish Now’ button. Choose a new team member from the dropdown list.
- Finalize your selection by clicking on the ‘Confirm‘ button.
Heads up! When you edit a product and submit a 4EP request:
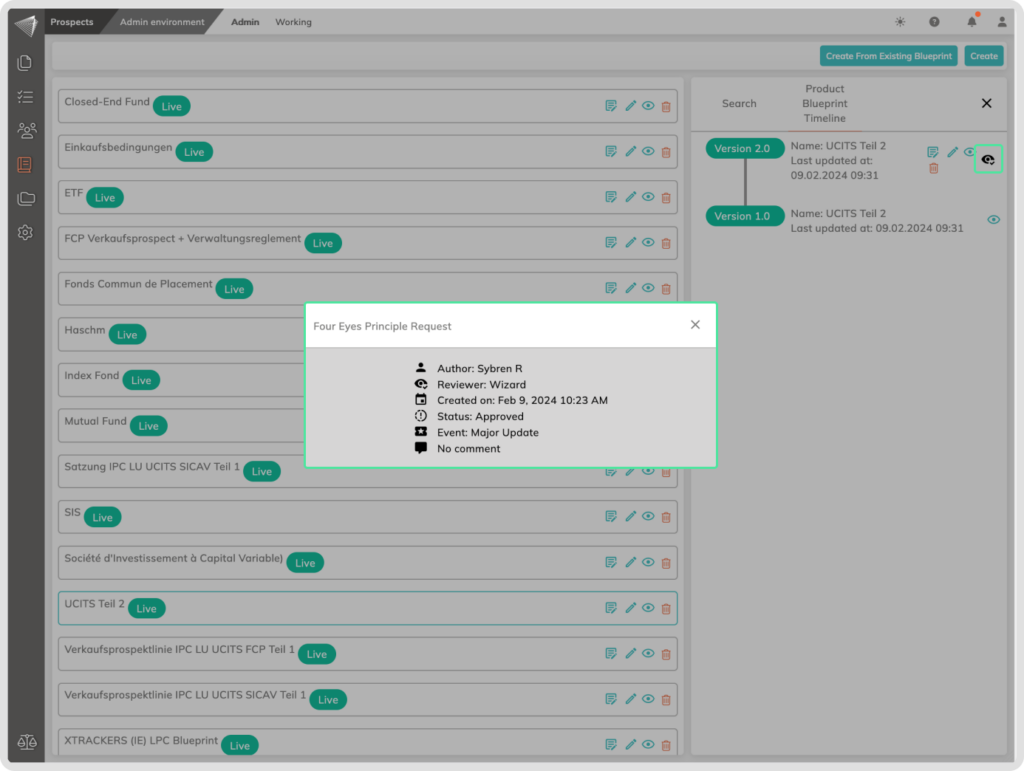
Hold tight! The product stays in its original form until the request is approved. But don’t worry, you can still see your proposed changes in the Timeline.
Spot the black eye icon! This replaces the usual editing icons and acts as your 4EP tracker. Click on any element with the black eye to open the Timeline.
Inside the Timeline, you’ll see another black eye icon. Click it for all the details about your 4EP request.
Bonus! Even after processing, the black eye icon appears in the popup, showing the current status of your request.
Need to make more tweaks? No problem! The original editing icons stay accessible in the timeline, allowing further adjustments.
Ready to manage 4EP requests? Let’s do it!
As a trusted expert, your colleagues rely on you to review and approve their proposed changes. Here’s how to manage those requests efficiently:
Access your Review Queue:
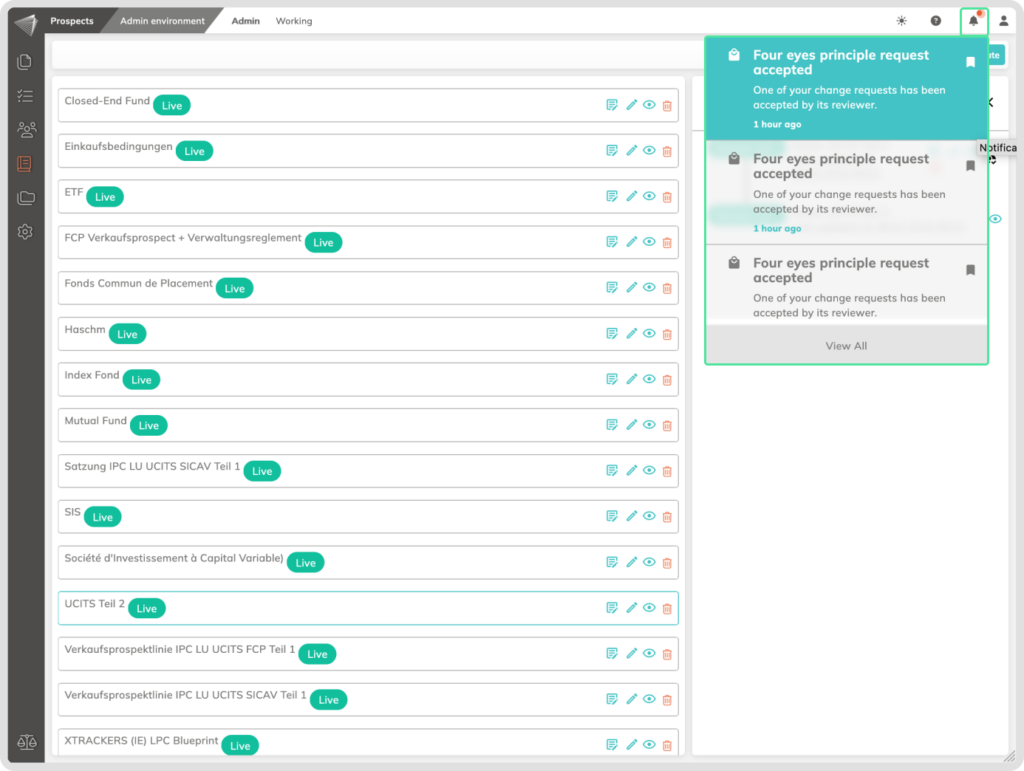
Head over to the Tasks menu and select the Review Requests submenu. This will display all requests assigned to you. You can also find the requests in the Notifications.
Review the Change Details:
Each request shows who made it, which platform area it affects, and a quick preview. Click the eye icon to jump directly to the specific change location.
Make Your Decision:
You have two handy icons to respond:
- Green icon containing an √: This approves the change.
- Red icon containing an X: This rejects the change.
Approving a Request:
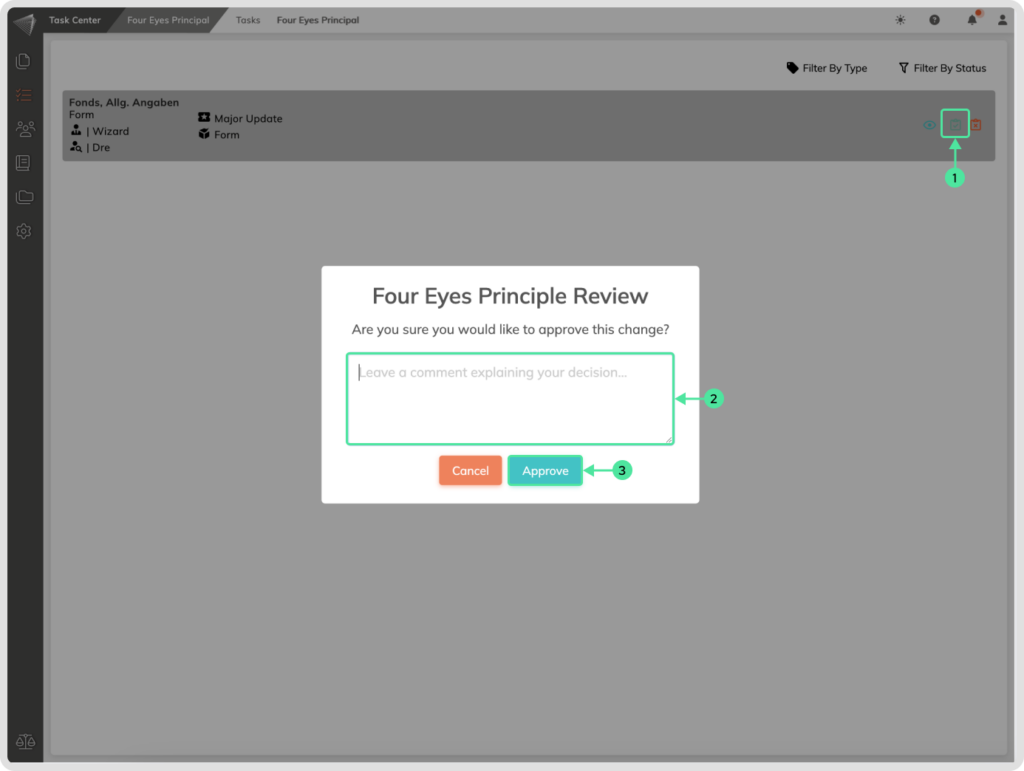
- Select the request you want to approve and click the green tick icon (√).
- (Optional) Add a comment supporting your approval.
- Click Approve.
Rejecting a Request:
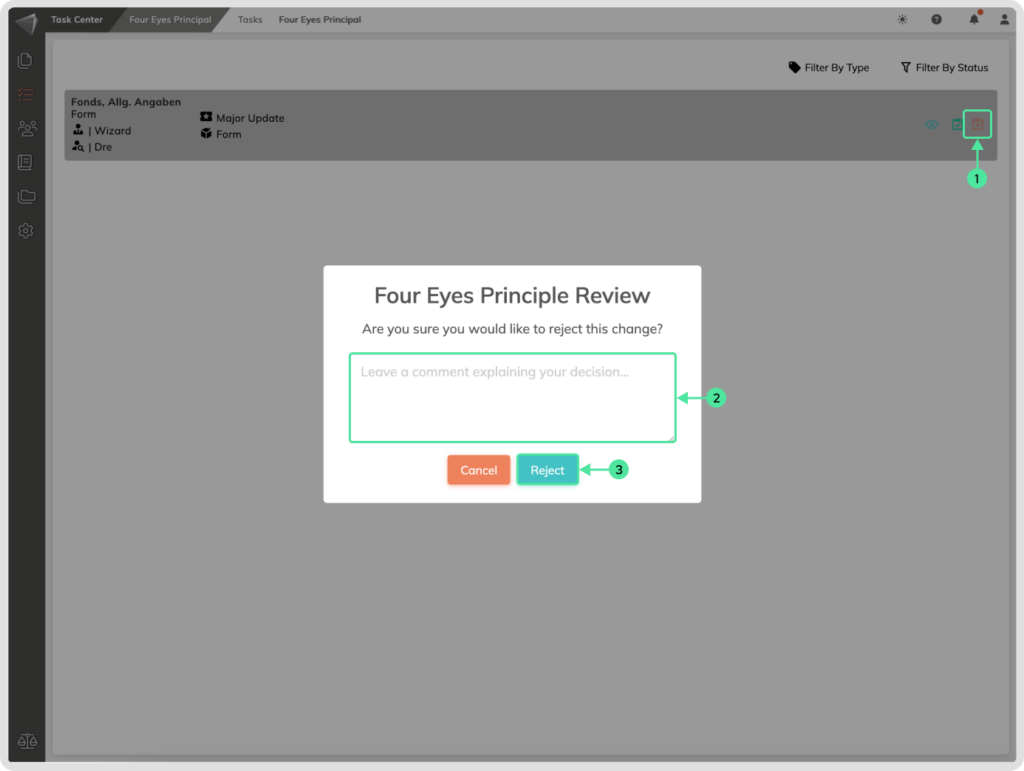
- Select the request you want to reject and click the red X icon.
- Add a comment supporting your rejection.
- Click Reject.
Feeling overwhelmed by requests? Take control with filters!
Managing a lot of 4EP requests can get hectic. But don’t worry, we’ve got you covered with handy filtering options:
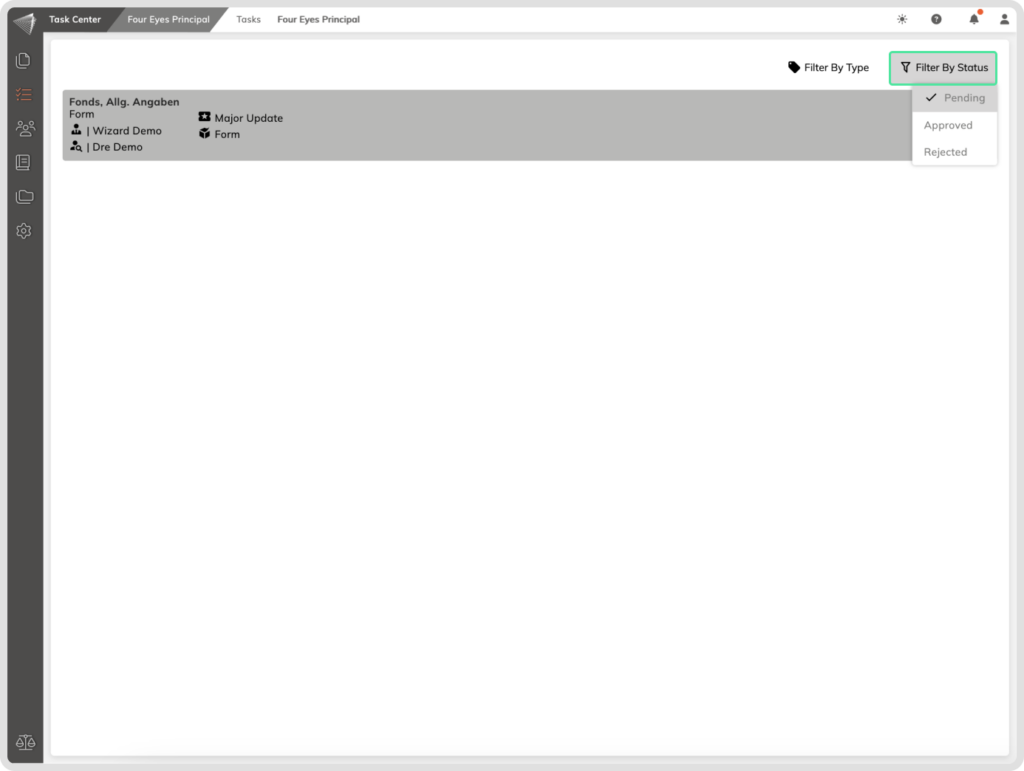
Filter by Status:
Focus on what matters: Quickly see approved, rejected, or pending requests, streamlining your review process.
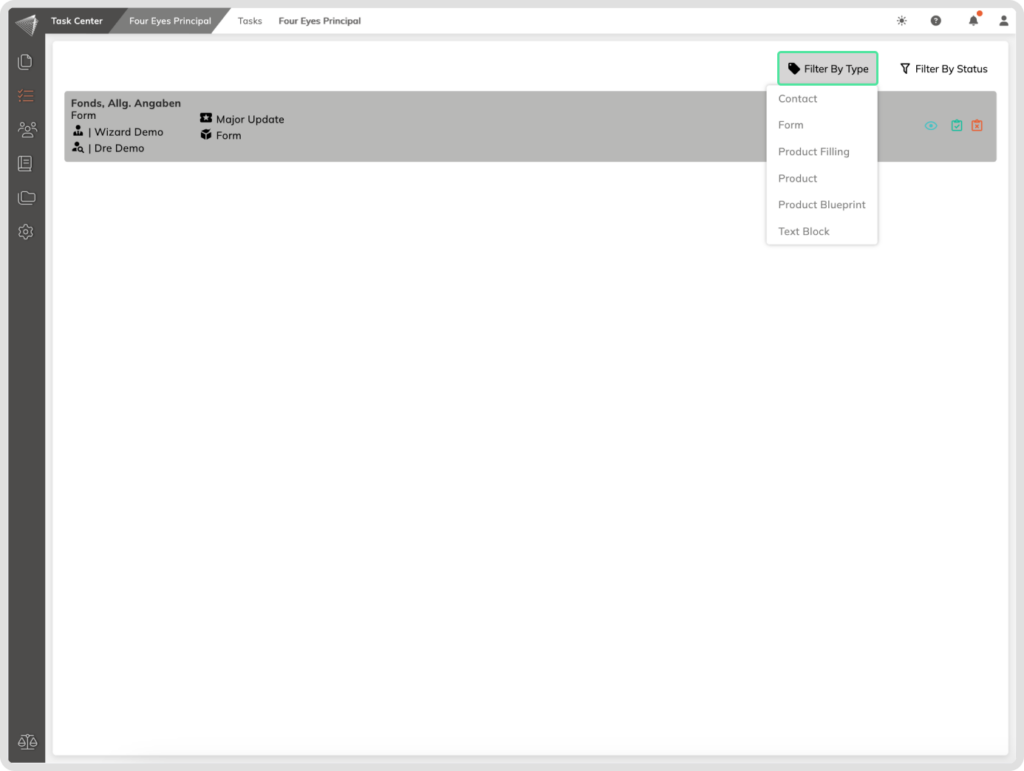
Filter by Type:
Dive into specifics: Target requests based on the platform area where changes were made, saving you time and effort.
This powerful tool helps you prioritize requests and make informed decisions efficiently.
